Parasitic wasp,
Thank you for laying your eggs
On the bad hornworm.

Parasitic wasp,
Thank you for laying your eggs
On the bad hornworm.
Hello all!
I’m sorry it’s been such a long time since my last post. It’s been quite busy here. I’ve been harvesting lots of tomatoes and beans and cucumbers. And my flowers are looking great — zinnias and dahlias and daisies. Everything even survived my two-week trip to Africa. Why? Irrigation on timers!

If every day were like today — steady light rain — I would not need an irrigation system. But summer in Georgia can be hot and dry and unforgiving, so it’s a good idea to have an irrigation plan. Some of my friends water by hand. But that’s a huge time commitment, and we all know that I’m lazy. Fortunately, my house came with an installed sprinkler system for the grass, and I’ve got my veggies on a drip irrigation system.
If you have grass, a sprinkler system can be helpful (some day, I will get rid of grass and go to an all drip system, but today is not that day). You just have to know how much water it emits. I like to use the pie pan test. I place pie pans at random places in the yard and see how much water is in them after ten or so minutes of sprinkling. Then I can calculate how long I need to leave the sprinkler on in each zone.
Sprinkler heads are a lot like smartphones. They last for a while, and then they just die. For years, I shelled out money for the sprinkler guy to come out and replace broken sprinkler heads. But after watching him replace the last one, I realized that it’s not that complicated. So now I can save the $50 service charge and replace the sprinkler head myself!
Step One: Confirm that the sprinkler head is, indeed, broken. Sometimes, a sprinkler head just gets stuck and needs a little push to start working again. But this sprinkler head stopped oscillating and could not be fixed, so it needed to go.

Step Two: dig up the broken sprinkler head. Be careful around the pipe!

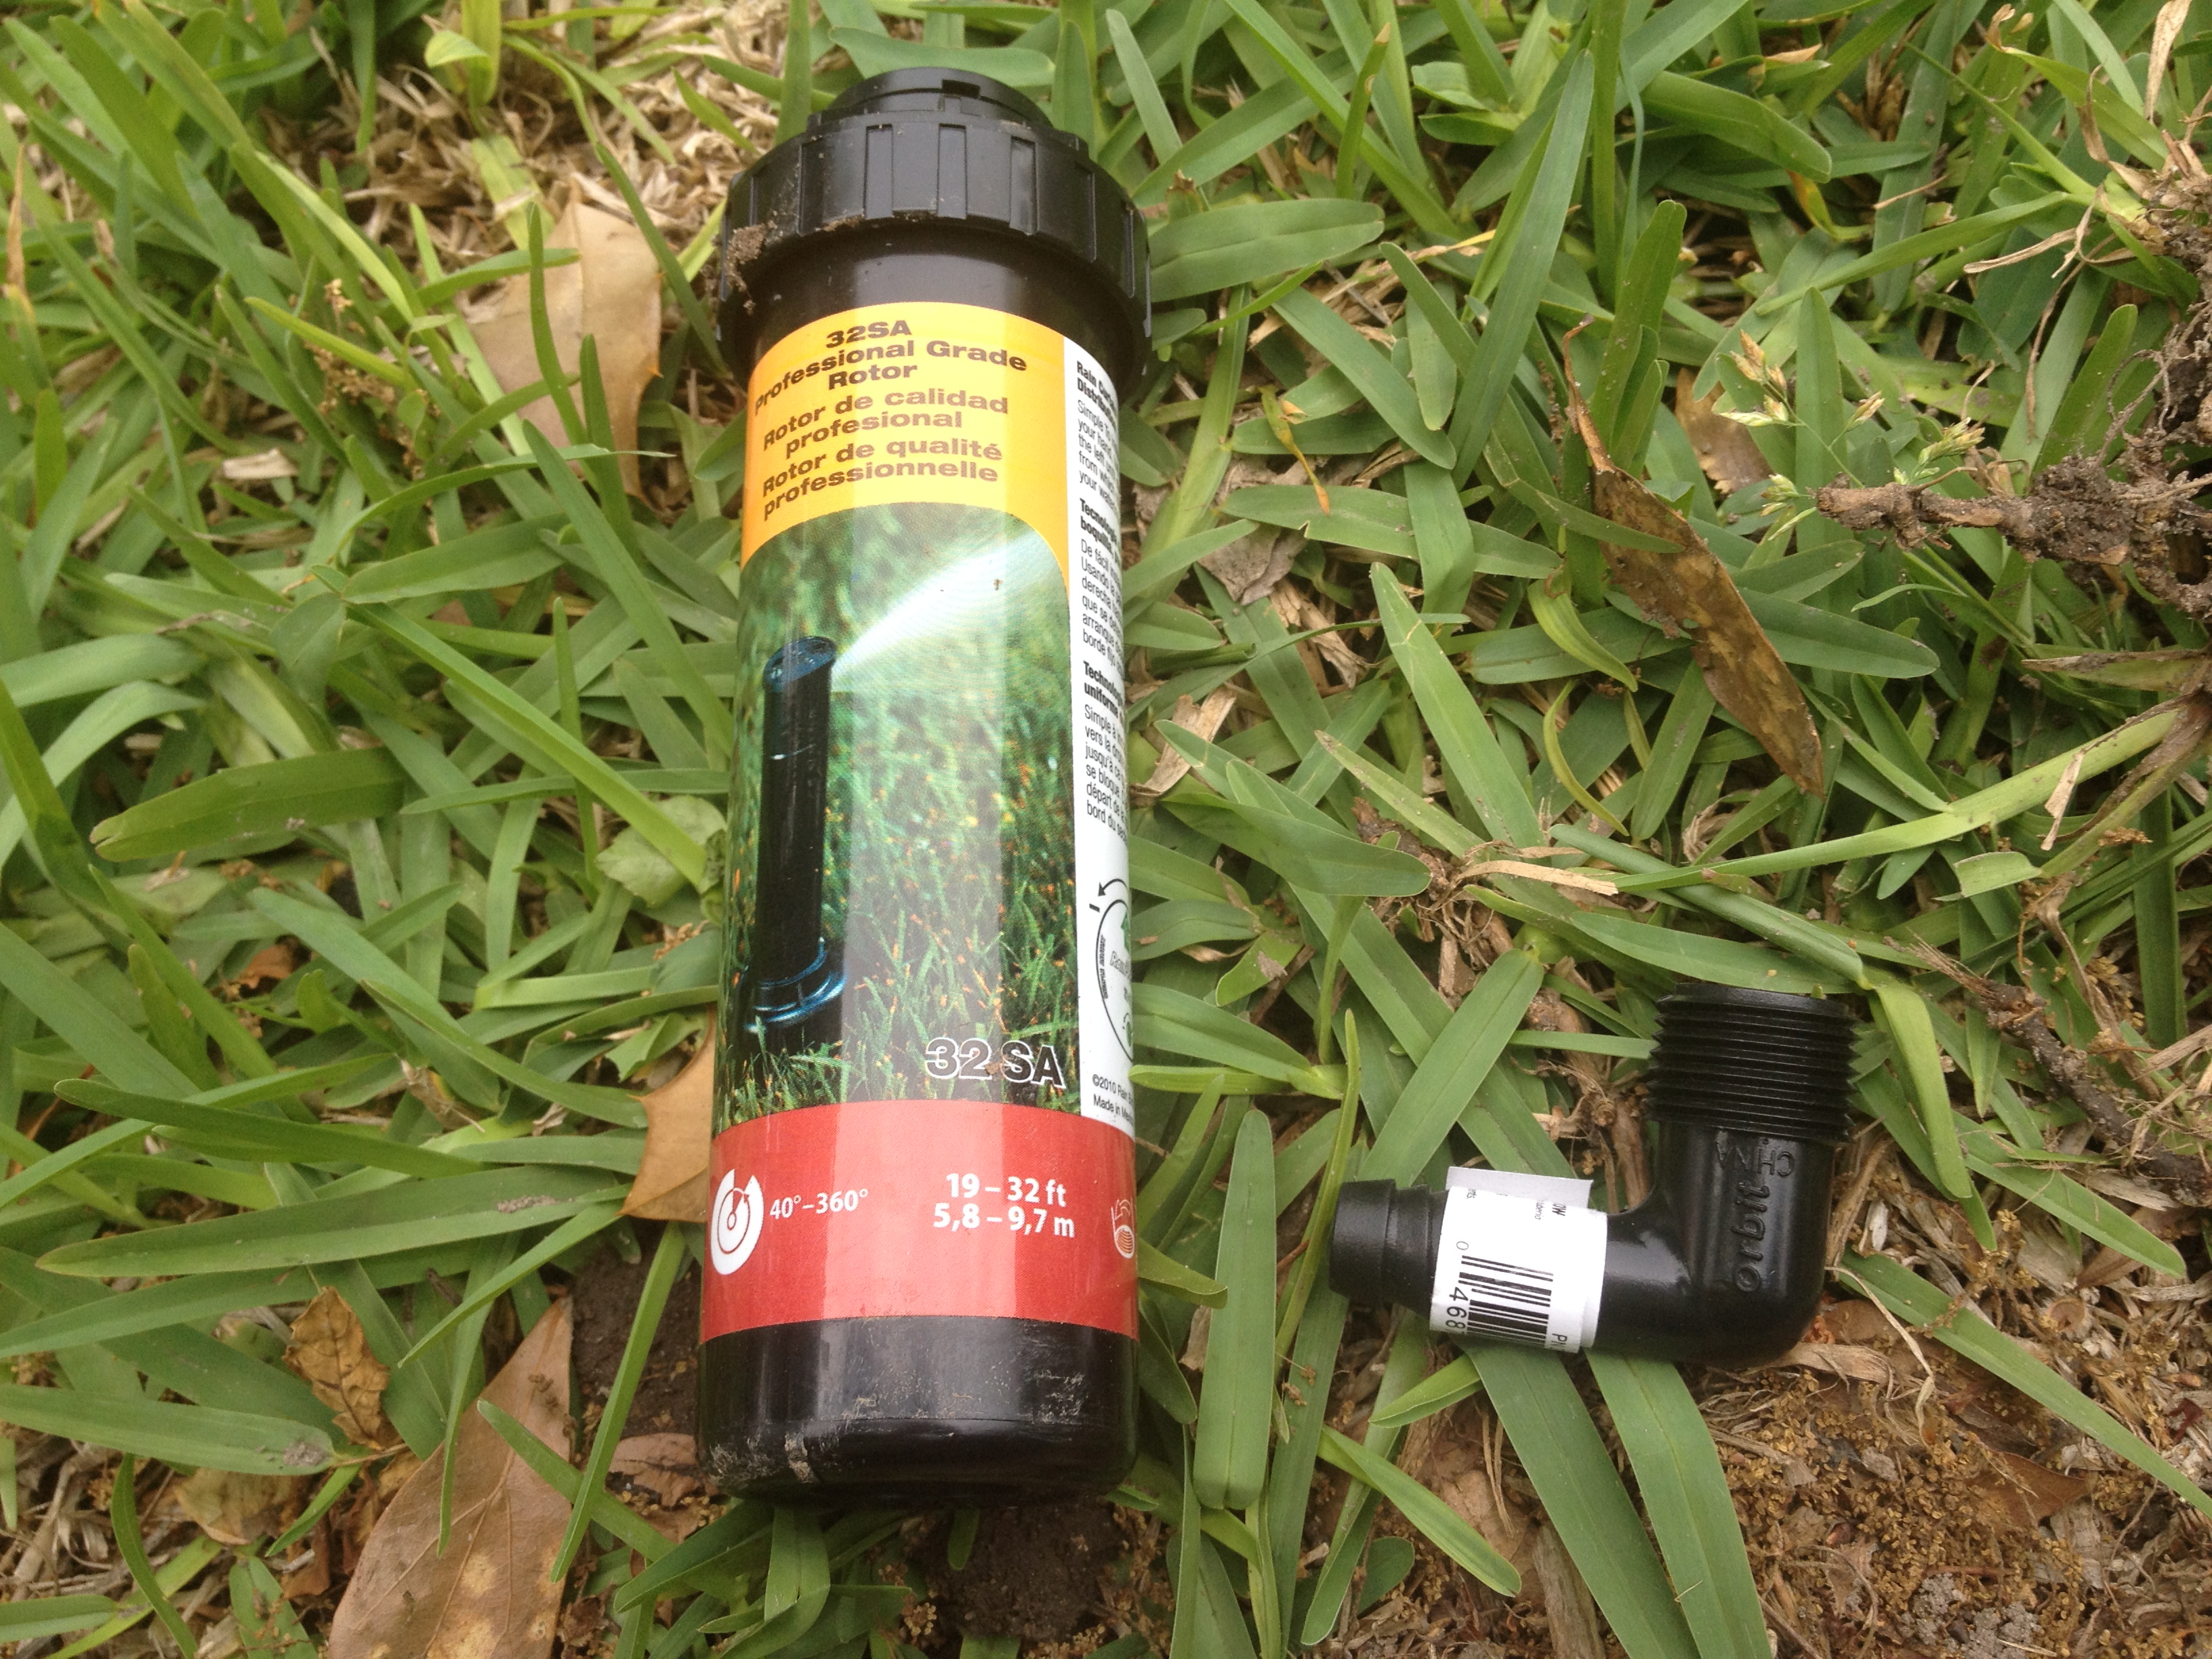
Step 3: obtain a new sprinkler head. Make sure you have the right connector!
Step 4: Attach the new sprinkler head to the pipe and bury. Make sure that the top of the sprinkler head is level with the ground. Then, you’re ready to adjust the sprinkler head so it conforms to the pattern and distance you need.

I do like the sprinkler system. But I LOVE my drip irrigation system. It saves me a ton of time and water. My raised beds and all of my large pots (including the hanging pots) are on drip irrigation systems. All you need is: 1) a timer, 2) a backflow preventer (if your timer doesn’t have one), 3) pressure regulator, 4) hose-to-tubing connector, 5) tubing, 6) connectors and emitters and end pieces, and 7) an emitter “punch” tool. If you’re a beginner, you might try a kit.
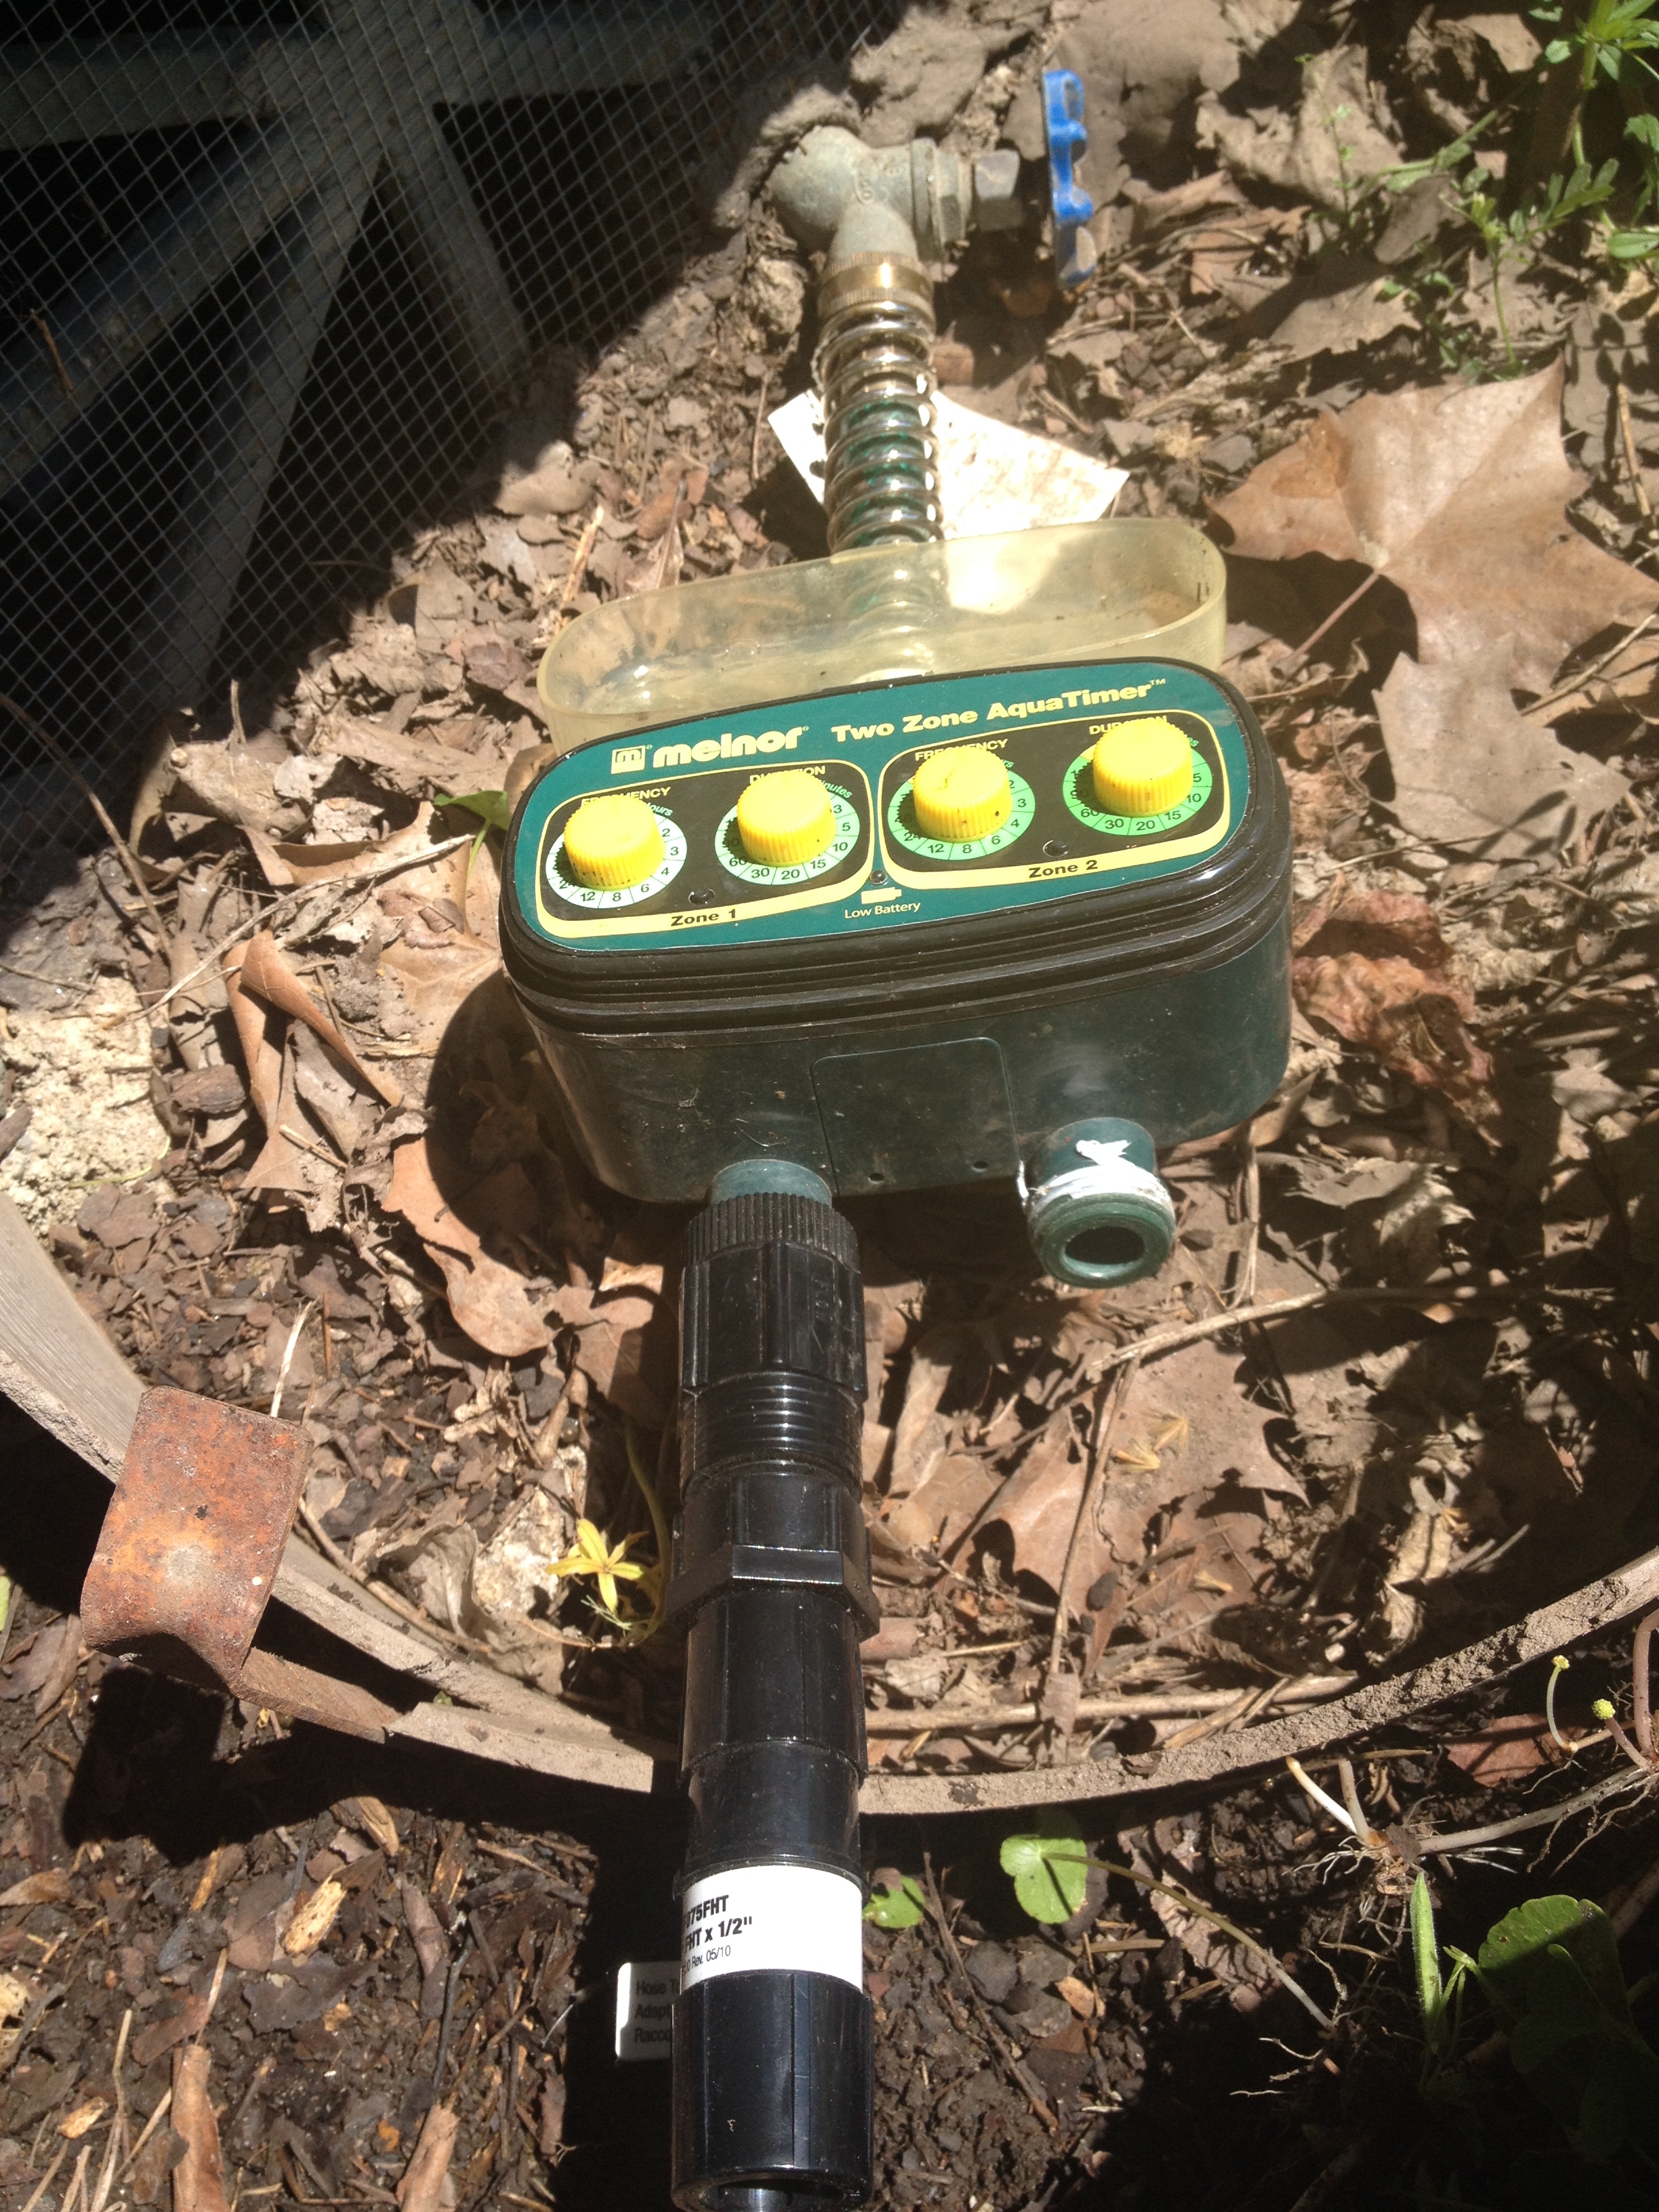
Step One: connect your timer, backflow preventer, pressure regulator, and tubing connector to the spigot. You may need to use plumber’s tape. Check for leaks and fix before moving to step two.
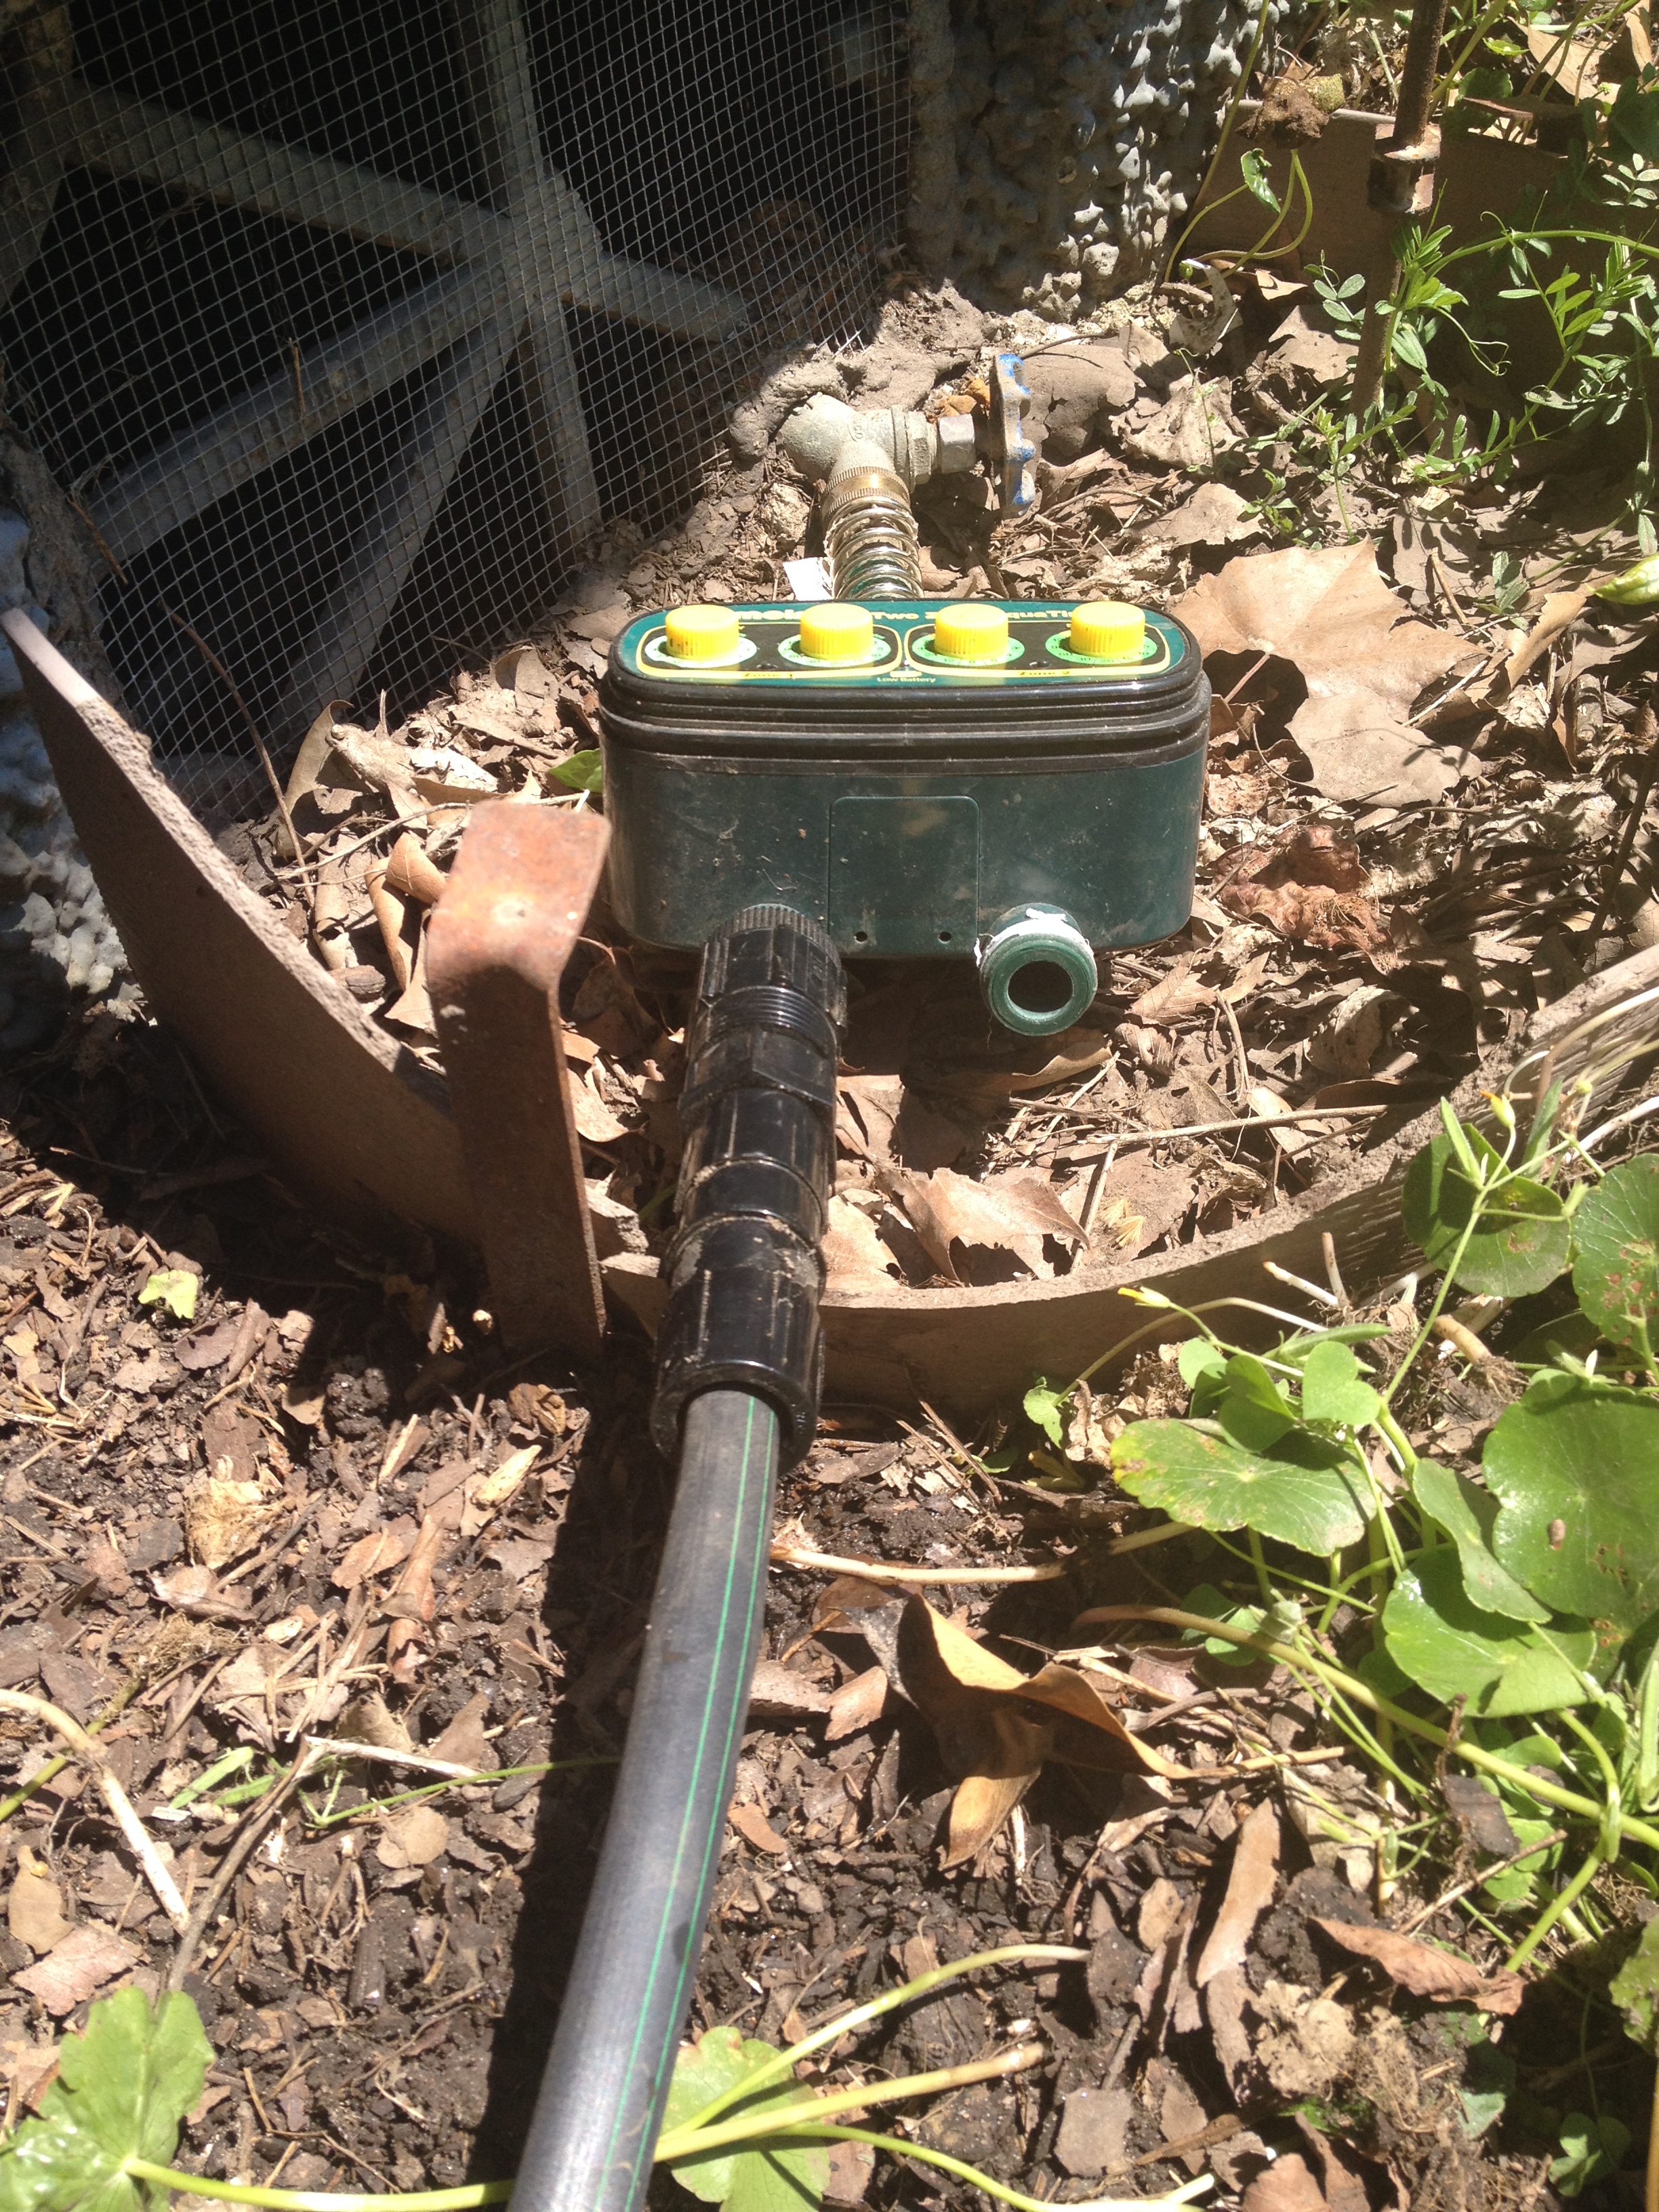
Step Two: connect the tubing. Check for leaks and fix.
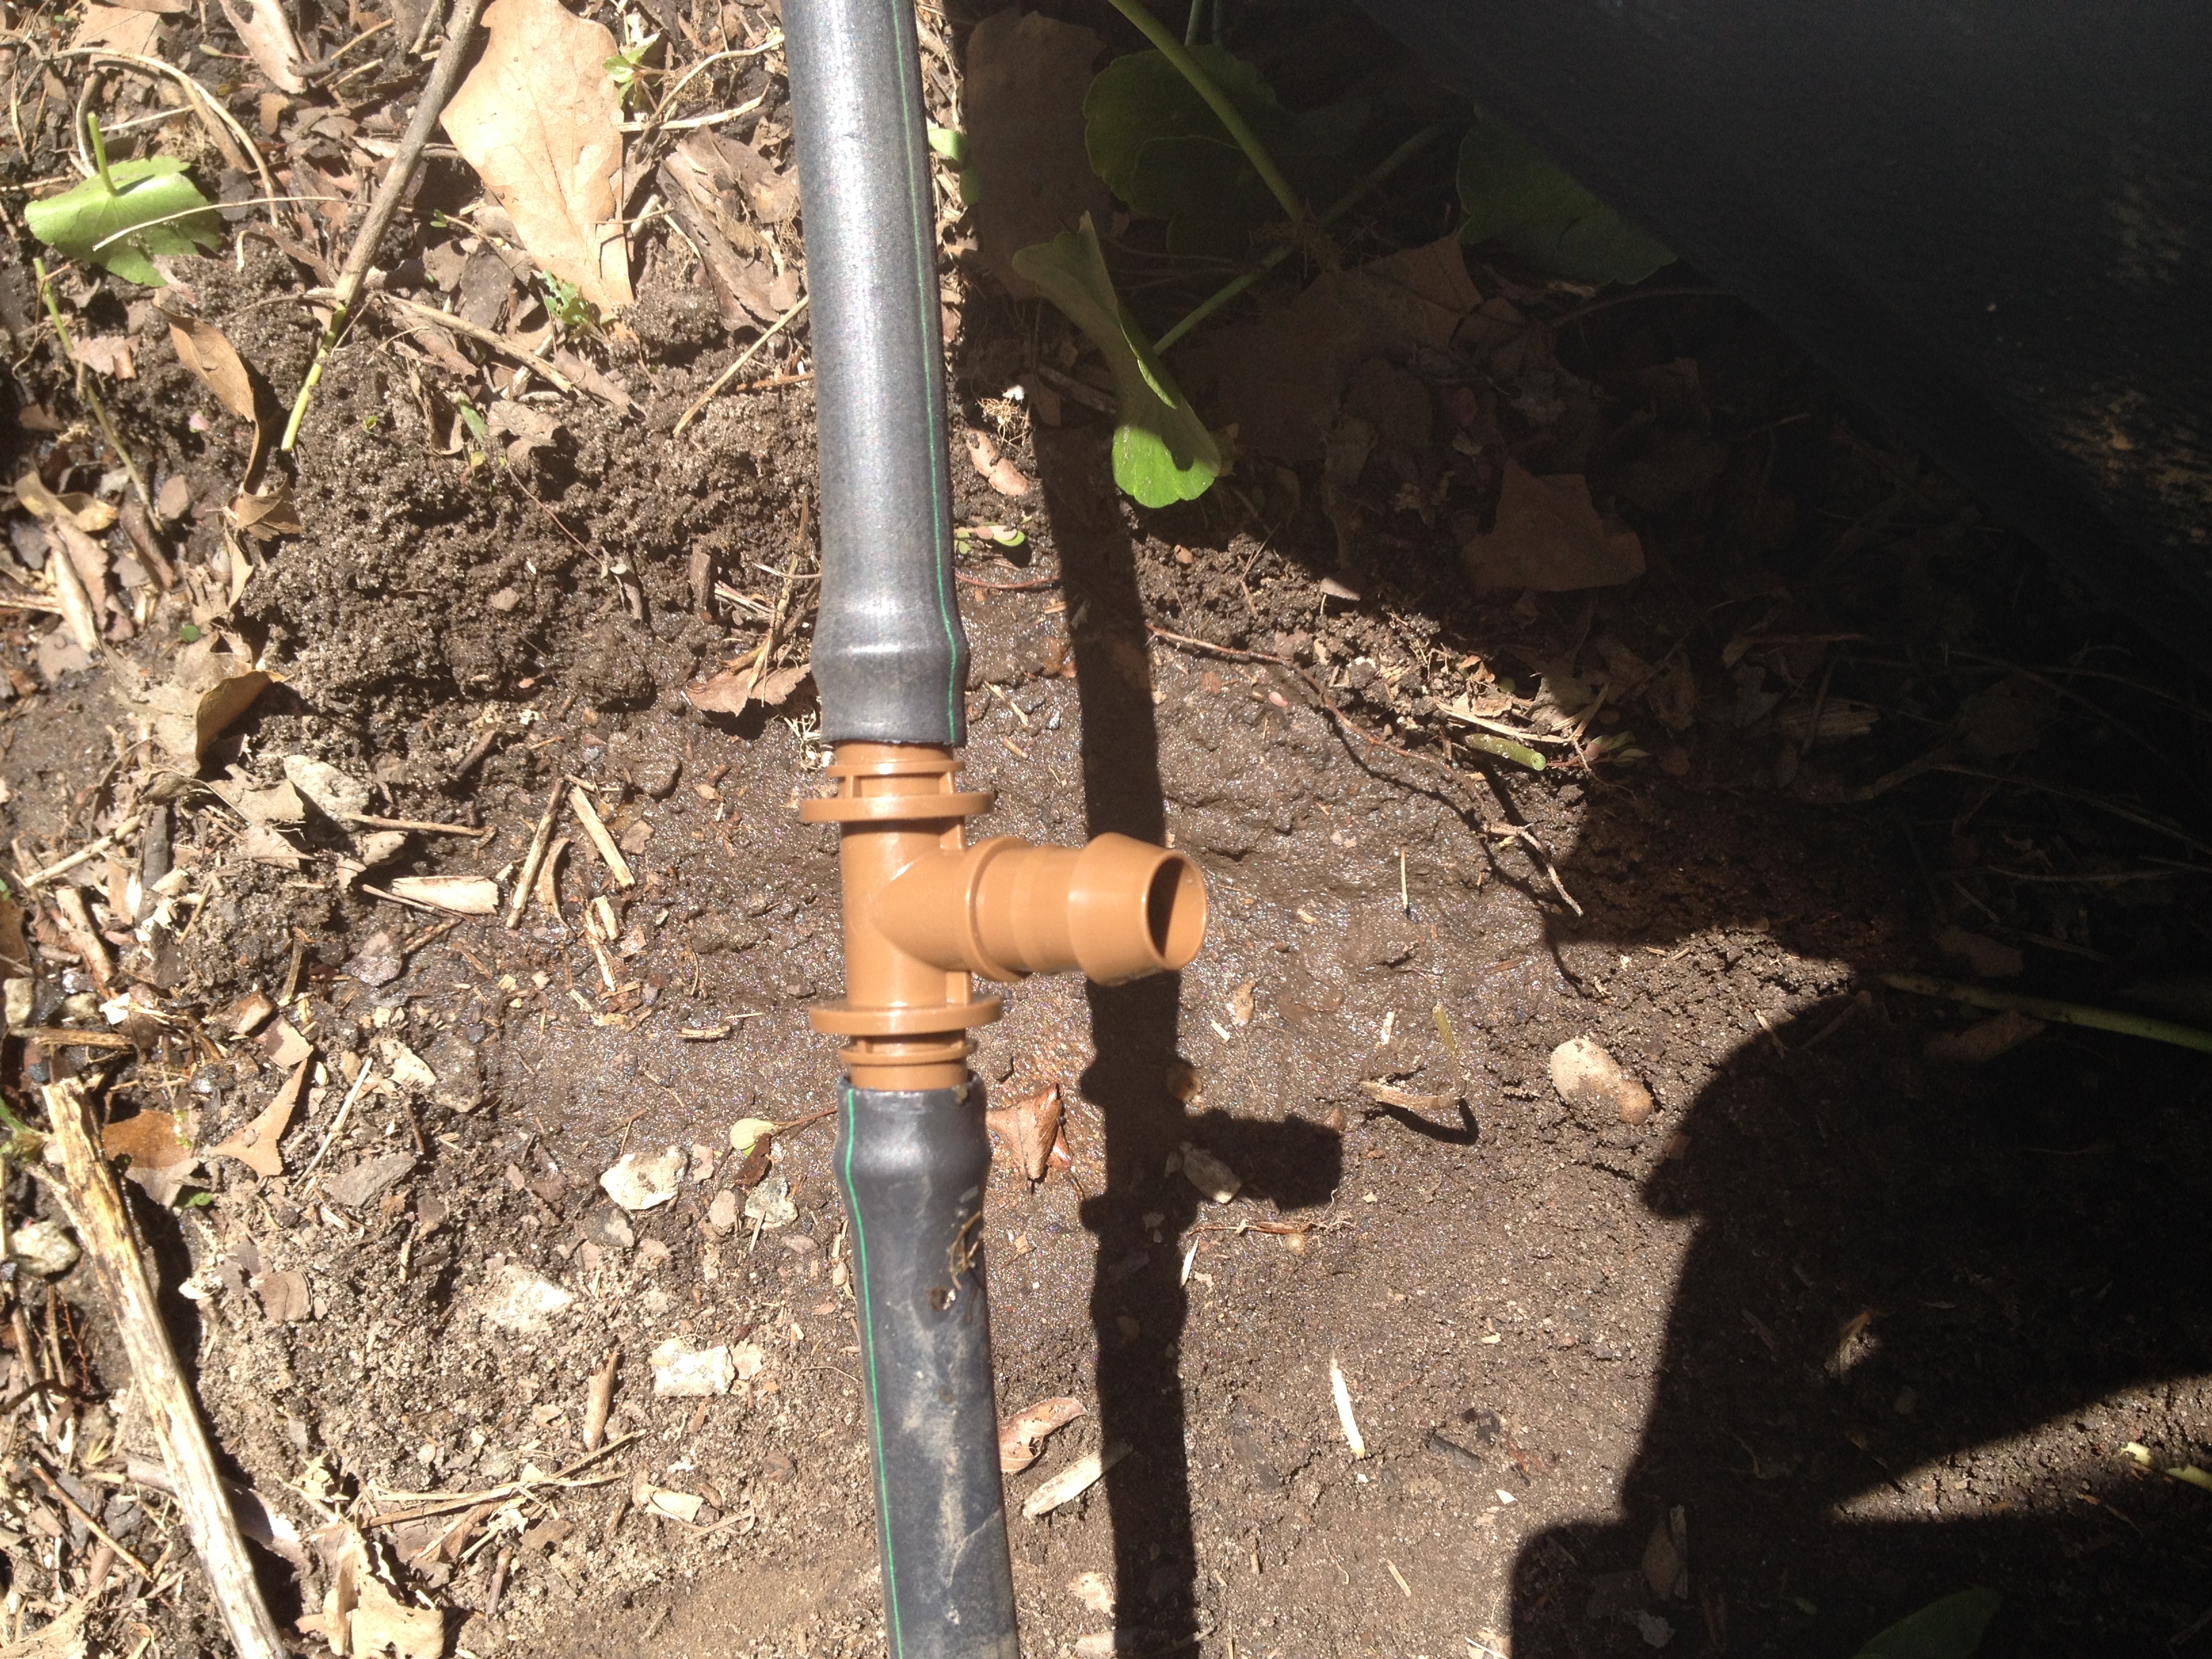
Step Three: use connectors to place the irrigation lines where you need them.
Step Four: use the emitter punch tool to insert the emitter.

Step Five: If your main tubing is not close enough to your plant, use 1/4 inch tubing to irrigate your plant.

Step Six: Check for leaks (if an emitter is not installed correctly, you may have a small geyser). And then set your timer! Now you’re ready to sit on the porch and have some lemonade. Enjoy!
Today, my goal is to put down as much mulch as possible. Mulch helps prevent weeds and water loss. So that’s my project. Yippee.
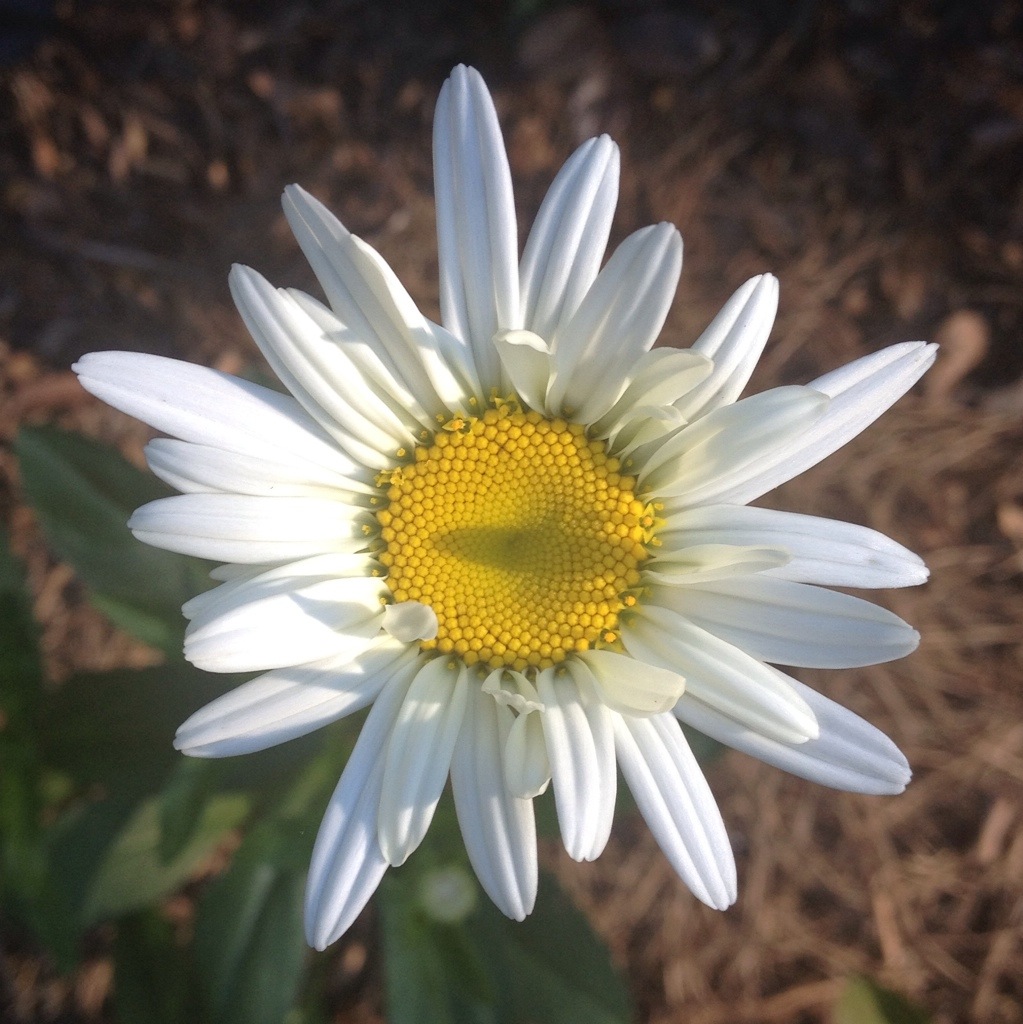
During my mulching, I saw some new blooms: daisies, hydrangeas, and gardenias. Summer is almost here, y’all!


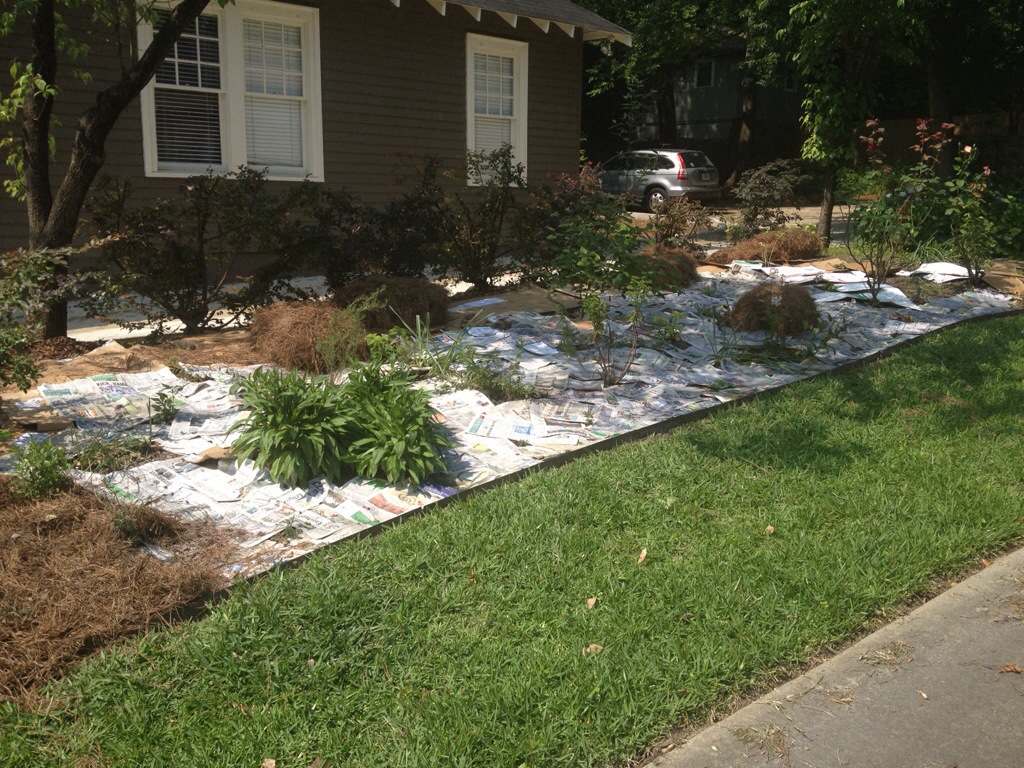
Mulch in progress: I put down newspaper first to slow down the weeds.
Back to the yard. Enjoy this beautiful day!
Every year, I have been thwarted by my evil arch nemesis, the squash vine borer. If you’re not familiar with this pest, count your lucky stars. A squash vine borer will turn your beautiful zucchini plant into a wilting heap of tragedy overnight. It’s bad, y’all.
So I moved my squash patch and resolved to be extra vigilant this year. I haven’t been great on the “extra vigilant” part, in part because of my wonderful trip last week to Holland, Michigan to see the tulips (more later). But I did move the zucchini to a spot that is right outside my carport, so I do see them a bit more often than I see some of my other veggies. I decided to check the vines for eggs yesterday, and I found some.

The book Good Bug, Bad Bug by Jessica Walliser suggests picking off the eggs and squashing them, plus spraying with a horticultural oil. And then double check for frass. If you see frass (it looks like sawdust), that means that the borer larvae have already hatched and started treating your plant as an all-you-can-eat buffet. Gently cut the stem with an X-acto knife and extract the borer with some tweezers. Then cover the wound with dirt. Here is a picture of a larva from last year, when I didn’t catch the eggs in time.

So, if you live in Middle Georgia and you’re growing squash or pumpkins, get outside this weekend and look for eggs. You’ll be so glad you did!
I hope you got through last night’s storms all right. All seems to be well in my neck of the woods, but the folks over and Alabama and Mississippi are hurting again. I hope tonight’s storm is not as bad.
As I was looking for downed limbs this afternoon, I noticed them. The snow peas! The first vegetables of my spring season! All fourteen of them! Some of which were a little too small to pick but I picked them anyway! So exciting!

Yes, there will be many more snow peas. And yes, I do long for the days of summer when I have my first Cherokee Purple on white bread with Duke’s mayonnaise. But the first harvest is a big milestone. It means that the vegetable garden is officially awake. It means that the hard work and planning are starting to pay off. And it means that I can’t continue to put off reinstalling my drip irrigation system. But for right now this second, I will savor each one of those fourteen little snow peas. Yum.
We survived last week’s frost warning and rain and made it to Easter! Though the day started out chilly and gray, the afternoon could not have been more beautiful. After I worked the early shift for the mission trip pancake breakfast, attended an excellent Easter service at The Ridge, and took a walk with my trusty Great Dane Clementine, I headed outside to spend a lovely day in the yard.
As I walked around making my mental to-do list, I saw it. My first peony blossom. I planted peonies two years ago, but they never bloomed. I think the cold winter encouraged the blossoms:

My First Peony Blossom
I also had a surprise amaryllis bloom. I usually dig up all the amaryllis bulbs in September so I can have them blooming for the holidays (seems like they always bloom right after the holidays), but I missed this one:

Surprise Amaryllis!
After I admired the flowers, I had to get to work. There was a lot to do! I spent most of yesterday afternoon pulling up pansies (and weeds) to make way for summer annuals. Today, I finally trimmed back the tea olive (I hated to cut them while they were blooming, so I just now got around to this task). Then I planted some zucchini and basil. Right. In. The. Front. Yard. Yes, people, I am a rebel. I figured 1) I’ve already got the tomato teepee, so I’m not destroying any fancy aesthetic by adding more veggies; 2) zucchini and basil are pretty; 3) there aren’t any draconian anti-vegetable restrictive covenants in my neighborhood (as far as I know); and 4) I was out of room in the raised beds.
I planted my dahlias right behind the zucchini and basil. I had dug up the dahlia tubers last fall and then started them in pots in March. I planted all of the ones that had shoots (only one didn’t—oh, well). I’m trying a new approach to weed maintenance: newspaper and pinestraw. That’s right. My Ledger-Enquirers will serve an important second purpose: weed barrier. I have tested this approach in several areas in the past, and it really does work for about a season. So I’ve decided to expand.
Why newspaper when the stores sell fancy weed barrier fabric? Friends, I’ve tried the fabric, and I’m here to tell you: don’t waste your money. Weeds are going to grow on top of the fabric after a year or two anyway. It’s a pain in the neck to cut holes when you want to plant something in the fabric covered area. And it’s expensive. Newspaper just lasts a season, but it’s easy to cut, and it’s free. If I want something a tad more durable–like for paths between my raised beds–I use cardboard or old towels and sheets that are too grungy for Goodwill.
A couple of pointers. The Ledger-Enquirer is so thin that I just lay out a whole section at a time. I find that it’s helpful to have a hose handy, particularly on a windy day. After I lay a few sections of newspaper, I wet them so they don’t blow away. Also, after experimenting with several different methods, I’ve determined that the best method is to cover the bed in newspaper and pinestraw, THEN plant the plants. Here is the finished product:

Zucchini, Basil, Dahlias, Knock-Outs, and Tomatoes
After I got the zucchini/basil/dahlia bed done, I used a similar approach with my strawberries and onions. I hope it works! I’ll keep you posted. Happy gardening.
Y’all, there is a freeze warning for parts of Georgia and Alabama tonight. Please check your forecast and take appropriate precautions if the temperature is expected to dip below 32. Walter Reeves advises us to cover tender plants (tomatoes, basil, etc.) with a cotton sheet or a cardboard box. Make sure to remove the cover in the morning when the temperature rises. See http://www.walterreeves.com/landscaping/protecting-plants-from-a-spring-cold-snap/ for more info.
It was a glorious Palm Sunday in middle Georgia. The sun was shining, the sky was blue, and the temperature was just about perfect. After an excellent church service at The Ridge, I spent most of the day in the yard.
Today, I focused on finishing my vegetable supports. Most of the vegetables we love will sprawl all over the place if we do not provide them with some support. And the best time to install the supports is before your sweet precious vegetables are in the ground. I’ve admitted this before: I decapitated a tomato plant when I tried to build a support structure around it. So now, I make sure my plants stay out of the construction zone. Supports go in first, then the plants.
First, let’s talk tomatoes. Most folks know that they need support. The stores sell contraptions called “tomato cages.” I should just buy a few of those for my tomatoes, right? Um, NO. Friends, those cages are great for many things, but if you’re growing anything other than a dwarf tomato, you’ll need something a whole lot taller than a three or four foot cage. Indeterminate tomato plants get to be seven or eight feet tall (or taller).
So what should you do? Well, you could use a simple old stake. A long piece of bamboo or a long wooden stake ought to do it. Just take some jute twine and tie the tomato plant to the stake as it grows. I used the stake system (just like my Daddy did) for several years, and it worked just fine.
When I started growing more than a few tomato plants, I decided that I should look into other options. Coincidentally, Southern Living ran an article on building your own tomato ladder (I have no clue when the article actually ran—I am usually a few years behind on my reading—but miraculously, I picked up an issue of Southern Living, and there it was). According to Southern Living, you just get a few two-by-twos, have the nice man at Home Depot cut them to the proper size, tie them together, and stick them in the ground. You’ll be done in half an hour. Pretty accurate except the half an hour part. Perhaps I’m just slow with knots. I did LOVE the result, though. The tomatoes grew right up the ladder (and, in the case of the Juliets and Black Plums, over the ladder and down the other side). Maintenance and harvest were easy. I used pressure treated wood, so I just left the structures in the ground. Mama said the hot pink mason line I used to tie the two-by-twos together was tacky; fortunately, it has faded a bit.
Tomato Ladders
This year, I decided to build another ladder for tomatoes and possibly pumpkins. And I thought I’d take advantage of the southern side of my house, which gets good light. I was greatly inspired by the book Vertical Gardening by Derek Fell. It is an excellent book with many ideas (I’m still a little overwhelmed by all the options). The single most important piece of advice Mr. Fell gave: use bamboo to save money! Mr. Fell, you changed my life. Thank you. I do not have any bamboo on my tiny lot, so I asked my friends if they had any. Turns out a lot of folks have bamboo, and they’ll be happy to let you come cut it. My sweet friends Brooke and Brandon told me, “our bamboo is your bamboo,” so I’ve been up to their lovely bamboo forest twice, and I think I’m set for now. Note: harvesting bamboo is a pretty good workout. Make sure your loppers are sharpened before you attempt it!
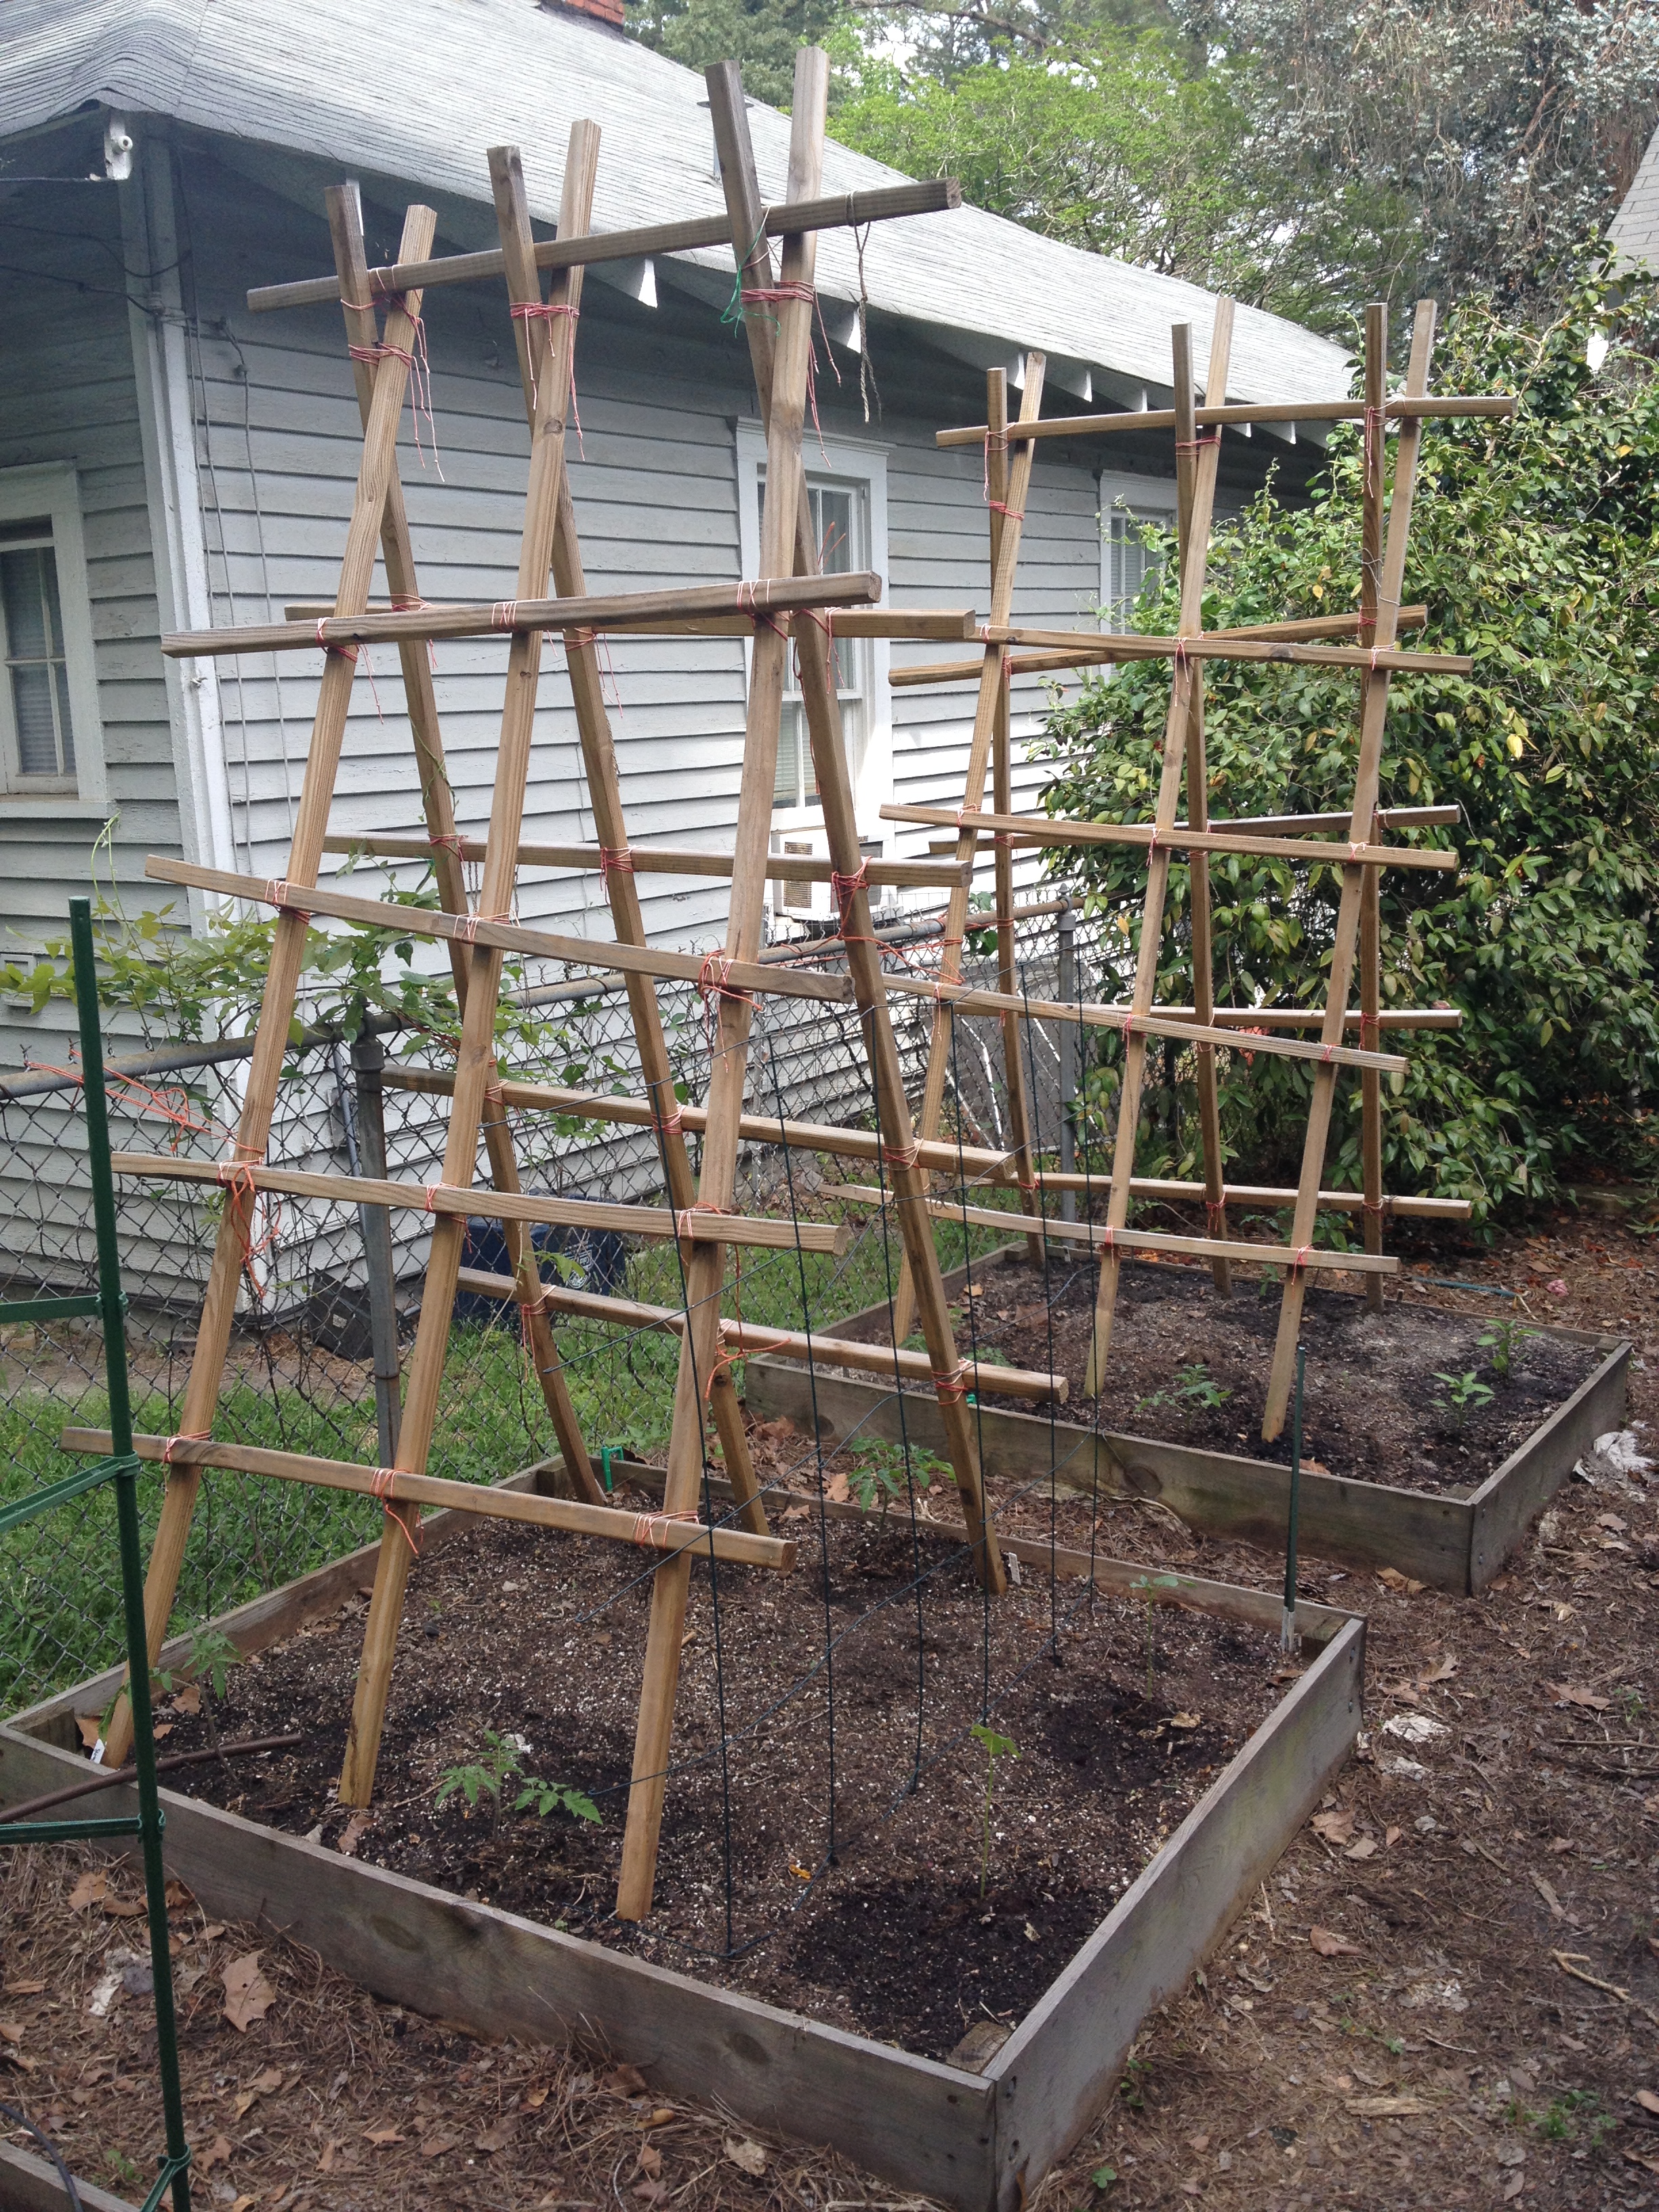
I built three bamboo structures to go next to the house. Two of them will support tomatoes, and the third will support butternut squash and spaghetti squash. I also built one large bamboo ladder/tent structure. The tent was originally ten feet tall, and my next door neighbors asked if I was planning to have a tribal meeting sometime soon, so I did cut it down a little. Now, I’ll actually be able to reach the tomatoes at the top without a ladder. My tennis coach gave me an old tennis net that otherwise would have gone into the trash (thanks, Mark!). I put that on one side of the ladder, and that is where my pumpkins will climb. The net-free side of the ladder is more tomatoes.

New “Tent” Ladder for Pumpkins and Tomatoes
Now that you know about some great ways to support your tomatoes, you may be wondering what you can do with those tomato cages. I use a three sided, four foot tall tomato cage for my cucumbers. It works great! And I use those round tomato cages for sweet peppers and eggplants. They’re also great for monarda (bee balm).

Good Use for “Tomato” Cages: Peppers and Eggplants
The only other special support I use in the garden is the support Daddy and I built for my pole beans (it also comes in handy for snow peas). The support is basically a frame of one-by-twos with kennel wire stapled to it. It would be cheaper to use netting instead of kennel wire, but I had the kennel wire left over from another project, so I went ahead and used it. The two bean supports I have were built four or so years ago, and they are still in good shape.
After I worked on the support structures, I finished planting my vegetables. Then I spent some time weeding (surprise!). While I weeded and planted, I came across some Japanese beetle grubs.

Japanese Beetle Grub
They are not “good bugs,” so I killed them.
I’m pretty wiped out from today’s work, so I’ll sign off. Hope you had a marvelous weekend. Happy gardening!
Beautiful blooming
Chinese Snowball Viburnum
takes my breath away

As I wandered around the yard last night looking at all the work that needs to be done, I took a little time to look at the flowers. After all, I spend a ton of time gardening so I will have beautiful flowers (and healthy fruits and veggies) to enjoy. Here are some of my favorite blooms from yesterday.


