It was a glorious Palm Sunday in middle Georgia. The sun was shining, the sky was blue, and the temperature was just about perfect. After an excellent church service at The Ridge, I spent most of the day in the yard.
Today, I focused on finishing my vegetable supports. Most of the vegetables we love will sprawl all over the place if we do not provide them with some support. And the best time to install the supports is before your sweet precious vegetables are in the ground. I’ve admitted this before: I decapitated a tomato plant when I tried to build a support structure around it. So now, I make sure my plants stay out of the construction zone. Supports go in first, then the plants.
First, let’s talk tomatoes. Most folks know that they need support. The stores sell contraptions called “tomato cages.” I should just buy a few of those for my tomatoes, right? Um, NO. Friends, those cages are great for many things, but if you’re growing anything other than a dwarf tomato, you’ll need something a whole lot taller than a three or four foot cage. Indeterminate tomato plants get to be seven or eight feet tall (or taller).
So what should you do? Well, you could use a simple old stake. A long piece of bamboo or a long wooden stake ought to do it. Just take some jute twine and tie the tomato plant to the stake as it grows. I used the stake system (just like my Daddy did) for several years, and it worked just fine.
When I started growing more than a few tomato plants, I decided that I should look into other options. Coincidentally, Southern Living ran an article on building your own tomato ladder (I have no clue when the article actually ran—I am usually a few years behind on my reading—but miraculously, I picked up an issue of Southern Living, and there it was). According to Southern Living, you just get a few two-by-twos, have the nice man at Home Depot cut them to the proper size, tie them together, and stick them in the ground. You’ll be done in half an hour. Pretty accurate except the half an hour part. Perhaps I’m just slow with knots. I did LOVE the result, though. The tomatoes grew right up the ladder (and, in the case of the Juliets and Black Plums, over the ladder and down the other side). Maintenance and harvest were easy. I used pressure treated wood, so I just left the structures in the ground. Mama said the hot pink mason line I used to tie the two-by-twos together was tacky; fortunately, it has faded a bit.

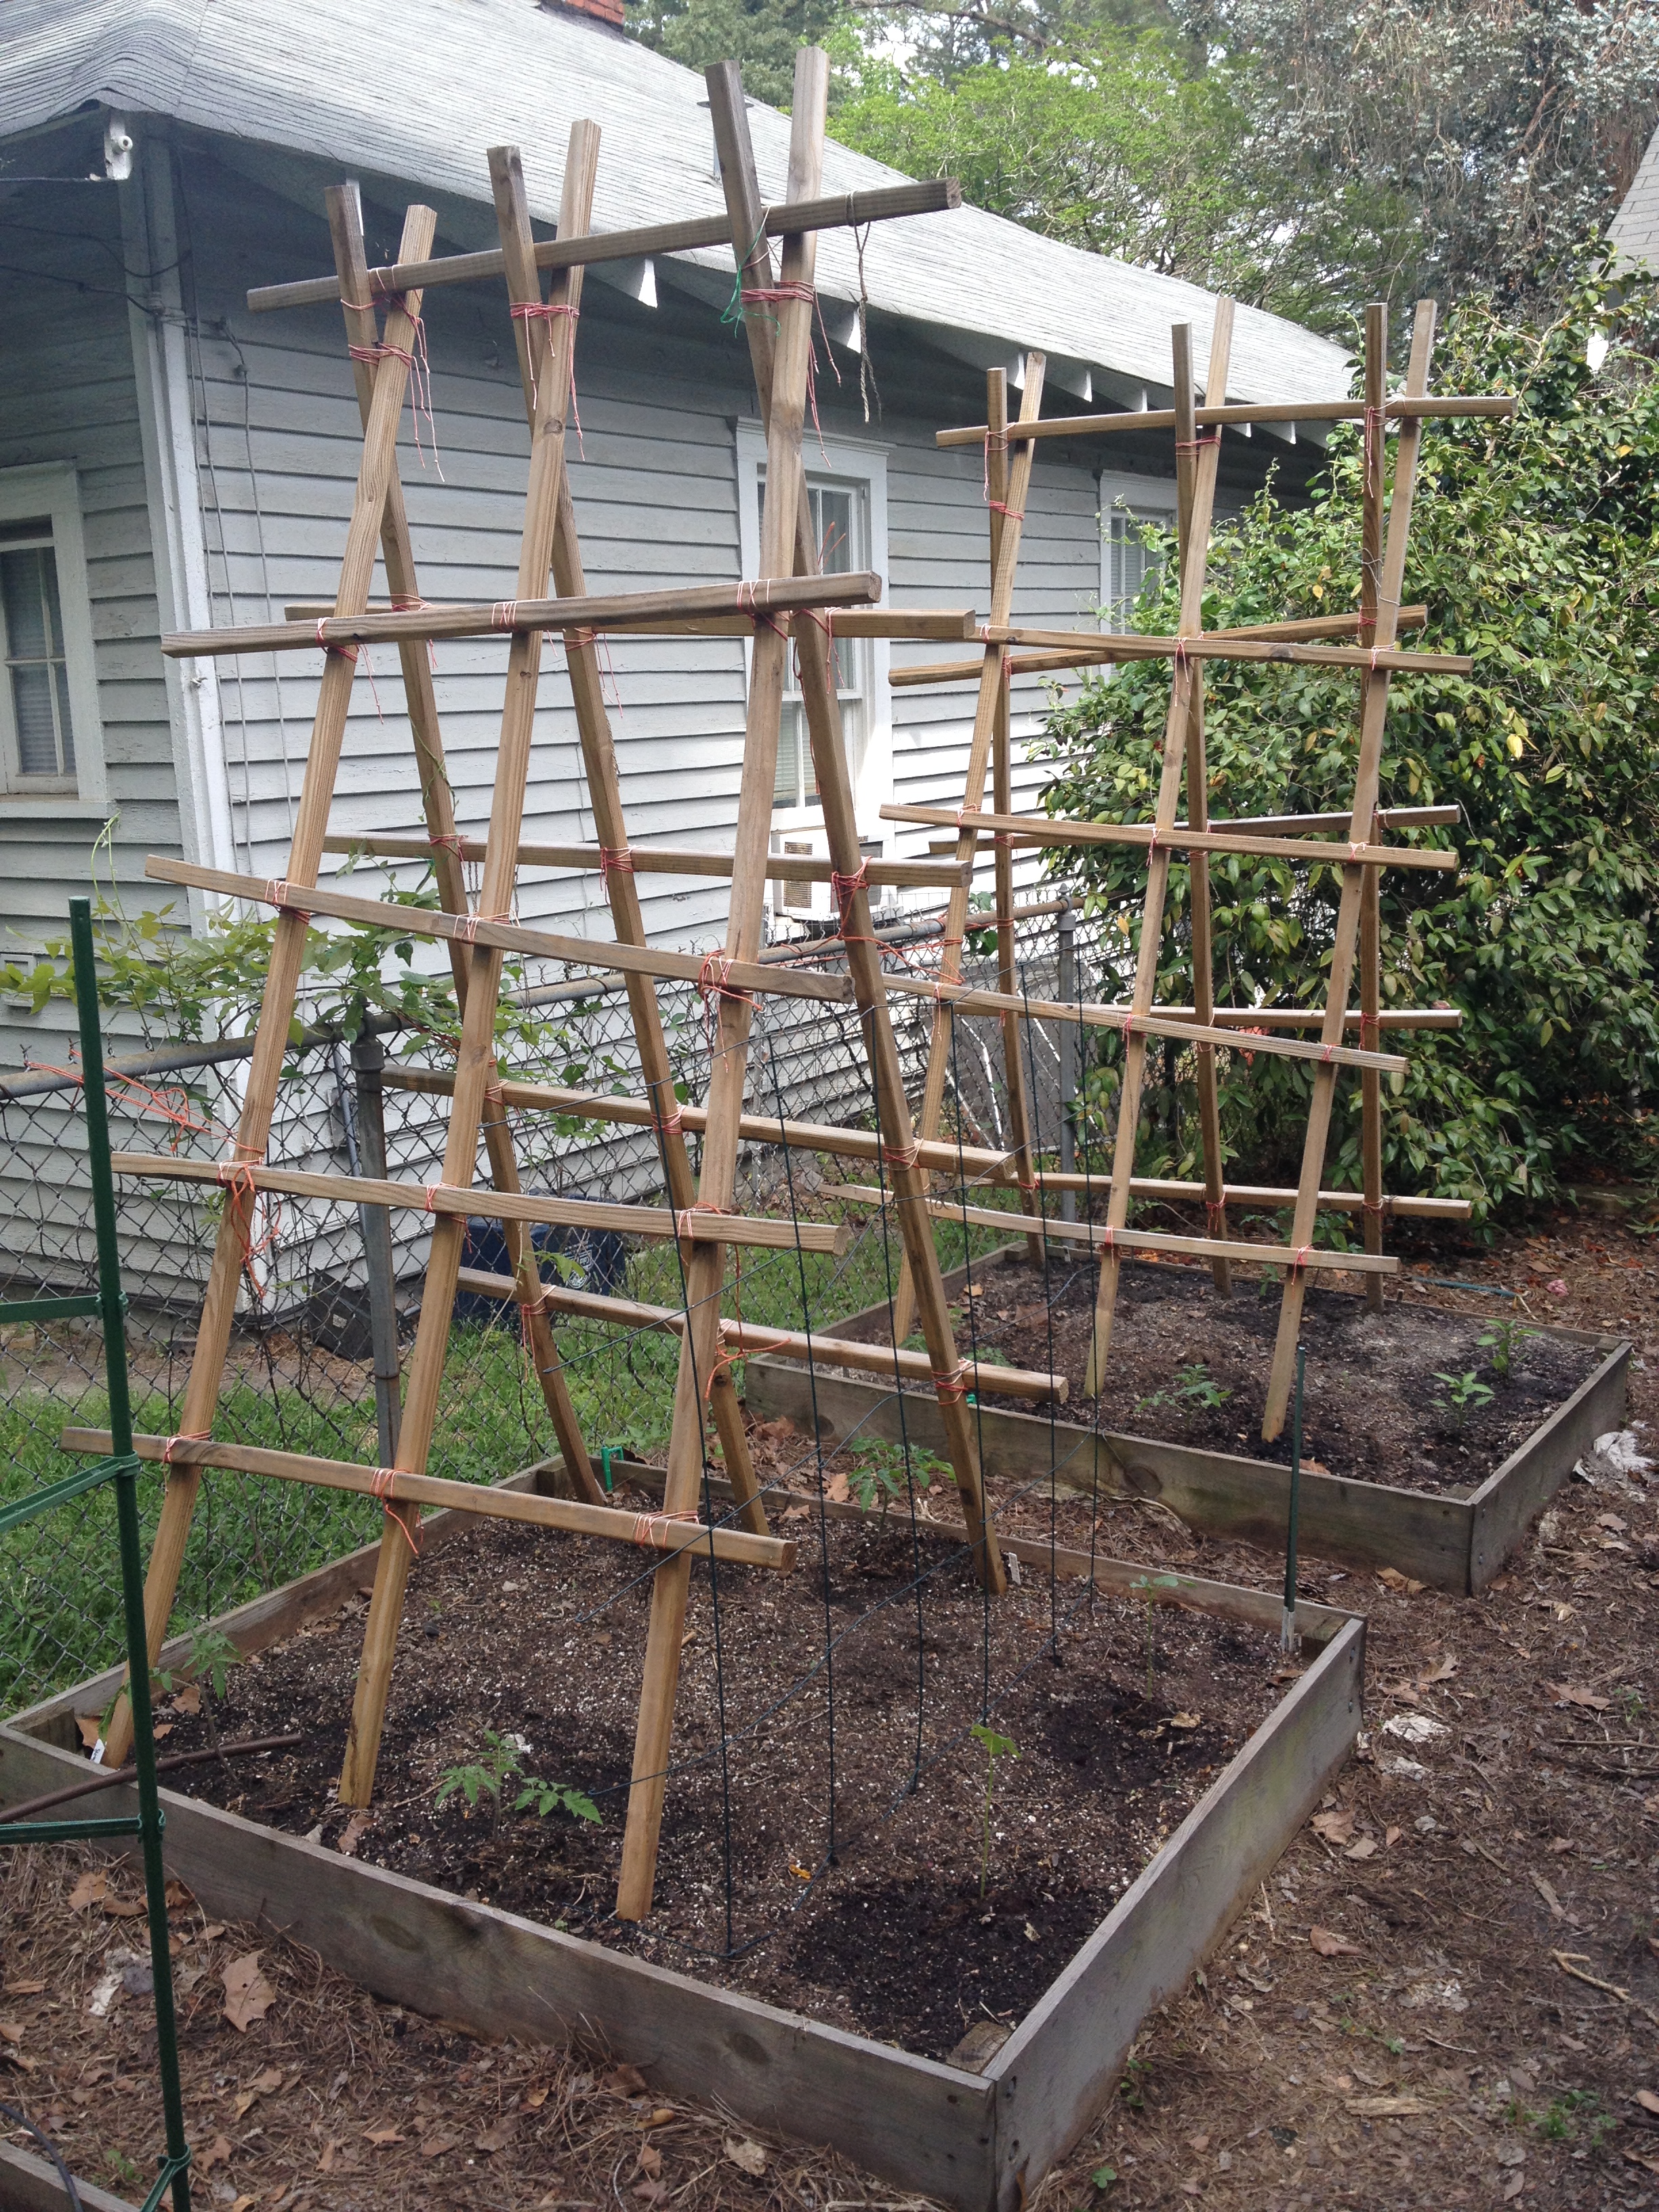
Tomato Ladders
This year, I decided to build another ladder for tomatoes and possibly pumpkins. And I thought I’d take advantage of the southern side of my house, which gets good light. I was greatly inspired by the book Vertical Gardening by Derek Fell. It is an excellent book with many ideas (I’m still a little overwhelmed by all the options). The single most important piece of advice Mr. Fell gave: use bamboo to save money! Mr. Fell, you changed my life. Thank you. I do not have any bamboo on my tiny lot, so I asked my friends if they had any. Turns out a lot of folks have bamboo, and they’ll be happy to let you come cut it. My sweet friends Brooke and Brandon told me, “our bamboo is your bamboo,” so I’ve been up to their lovely bamboo forest twice, and I think I’m set for now. Note: harvesting bamboo is a pretty good workout. Make sure your loppers are sharpened before you attempt it!
I built three bamboo structures to go next to the house. Two of them will support tomatoes, and the third will support butternut squash and spaghetti squash. I also built one large bamboo ladder/tent structure. The tent was originally ten feet tall, and my next door neighbors asked if I was planning to have a tribal meeting sometime soon, so I did cut it down a little. Now, I’ll actually be able to reach the tomatoes at the top without a ladder. My tennis coach gave me an old tennis net that otherwise would have gone into the trash (thanks, Mark!). I put that on one side of the ladder, and that is where my pumpkins will climb. The net-free side of the ladder is more tomatoes.

New “Tent” Ladder for Pumpkins and Tomatoes
Now that you know about some great ways to support your tomatoes, you may be wondering what you can do with those tomato cages. I use a three sided, four foot tall tomato cage for my cucumbers. It works great! And I use those round tomato cages for sweet peppers and eggplants. They’re also great for monarda (bee balm).

Good Use for “Tomato” Cages: Peppers and Eggplants
The only other special support I use in the garden is the support Daddy and I built for my pole beans (it also comes in handy for snow peas). The support is basically a frame of one-by-twos with kennel wire stapled to it. It would be cheaper to use netting instead of kennel wire, but I had the kennel wire left over from another project, so I went ahead and used it. The two bean supports I have were built four or so years ago, and they are still in good shape.
After I worked on the support structures, I finished planting my vegetables. Then I spent some time weeding (surprise!). While I weeded and planted, I came across some Japanese beetle grubs.

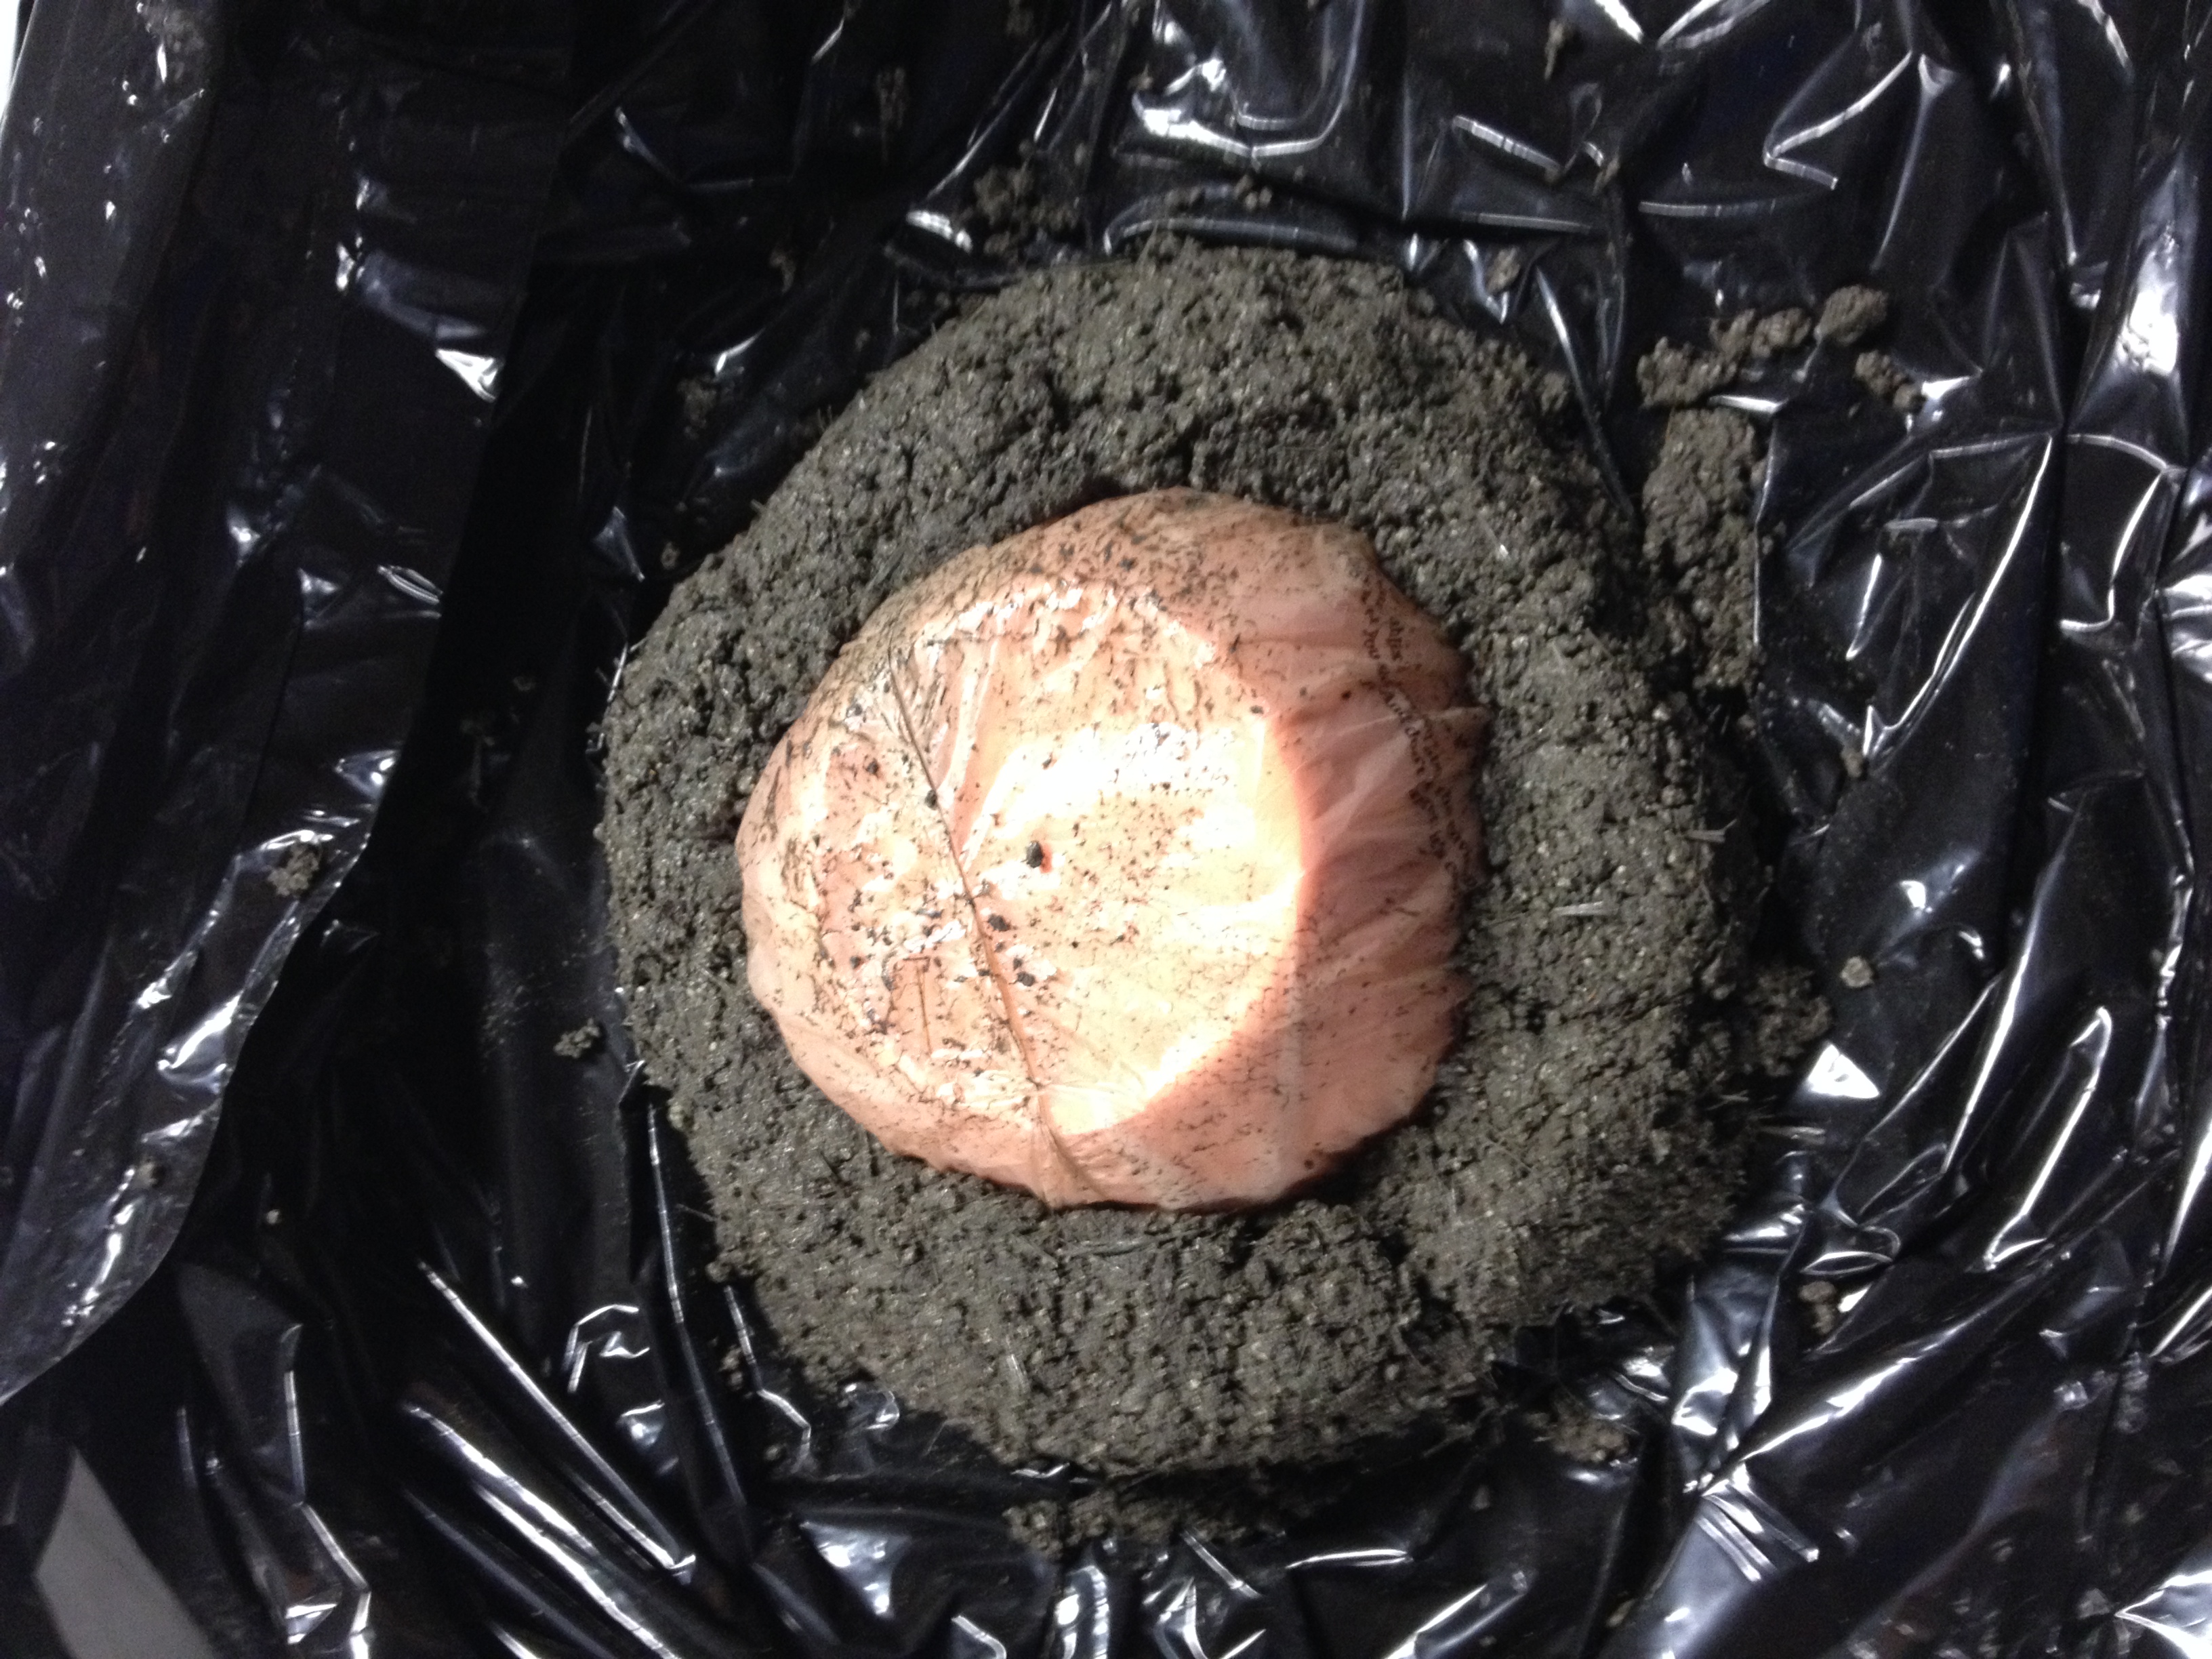
Japanese Beetle Grub
They are not “good bugs,” so I killed them.
I’m pretty wiped out from today’s work, so I’ll sign off. Hope you had a marvelous weekend. Happy gardening!