Last Saturday, I attended an exciting workshop on hypertufa at the Columbus Botanical Garden. Toni Fogle, a lawyer-turned-hypertufa enthusiast, taught a gaggle of ladies and one gentleman how to craft our own (relatively) lightweight stone-like containers. We had a super time getting dirty and sculpting our vessels.
Ms. Fogle learned how to make hypertufa from her mother, who makes hypertufa containers for the Cox Arboretum in Dayton, Ohio. Ms. Fogle now lives in Columbus, is a member of the Azalea Garden Club, and hosts hypertufa workshops at her home. She repeatedly emphasized that she is not an expert, but she sure seemed like an expert to me. She had an answer for every question, and she really knew her stuff!
So what is hypertufa? It is a popular medium for making garden pots, troughs, and ornaments. It has a stone-like appearance but is much lighter. Hypertufa is made of Portland cement and peat, plus either perlite or vermiculite (and maybe sand, depending on the recipe). And when you’re molding it, it’s like Play-Doh for grown ups, y’all.
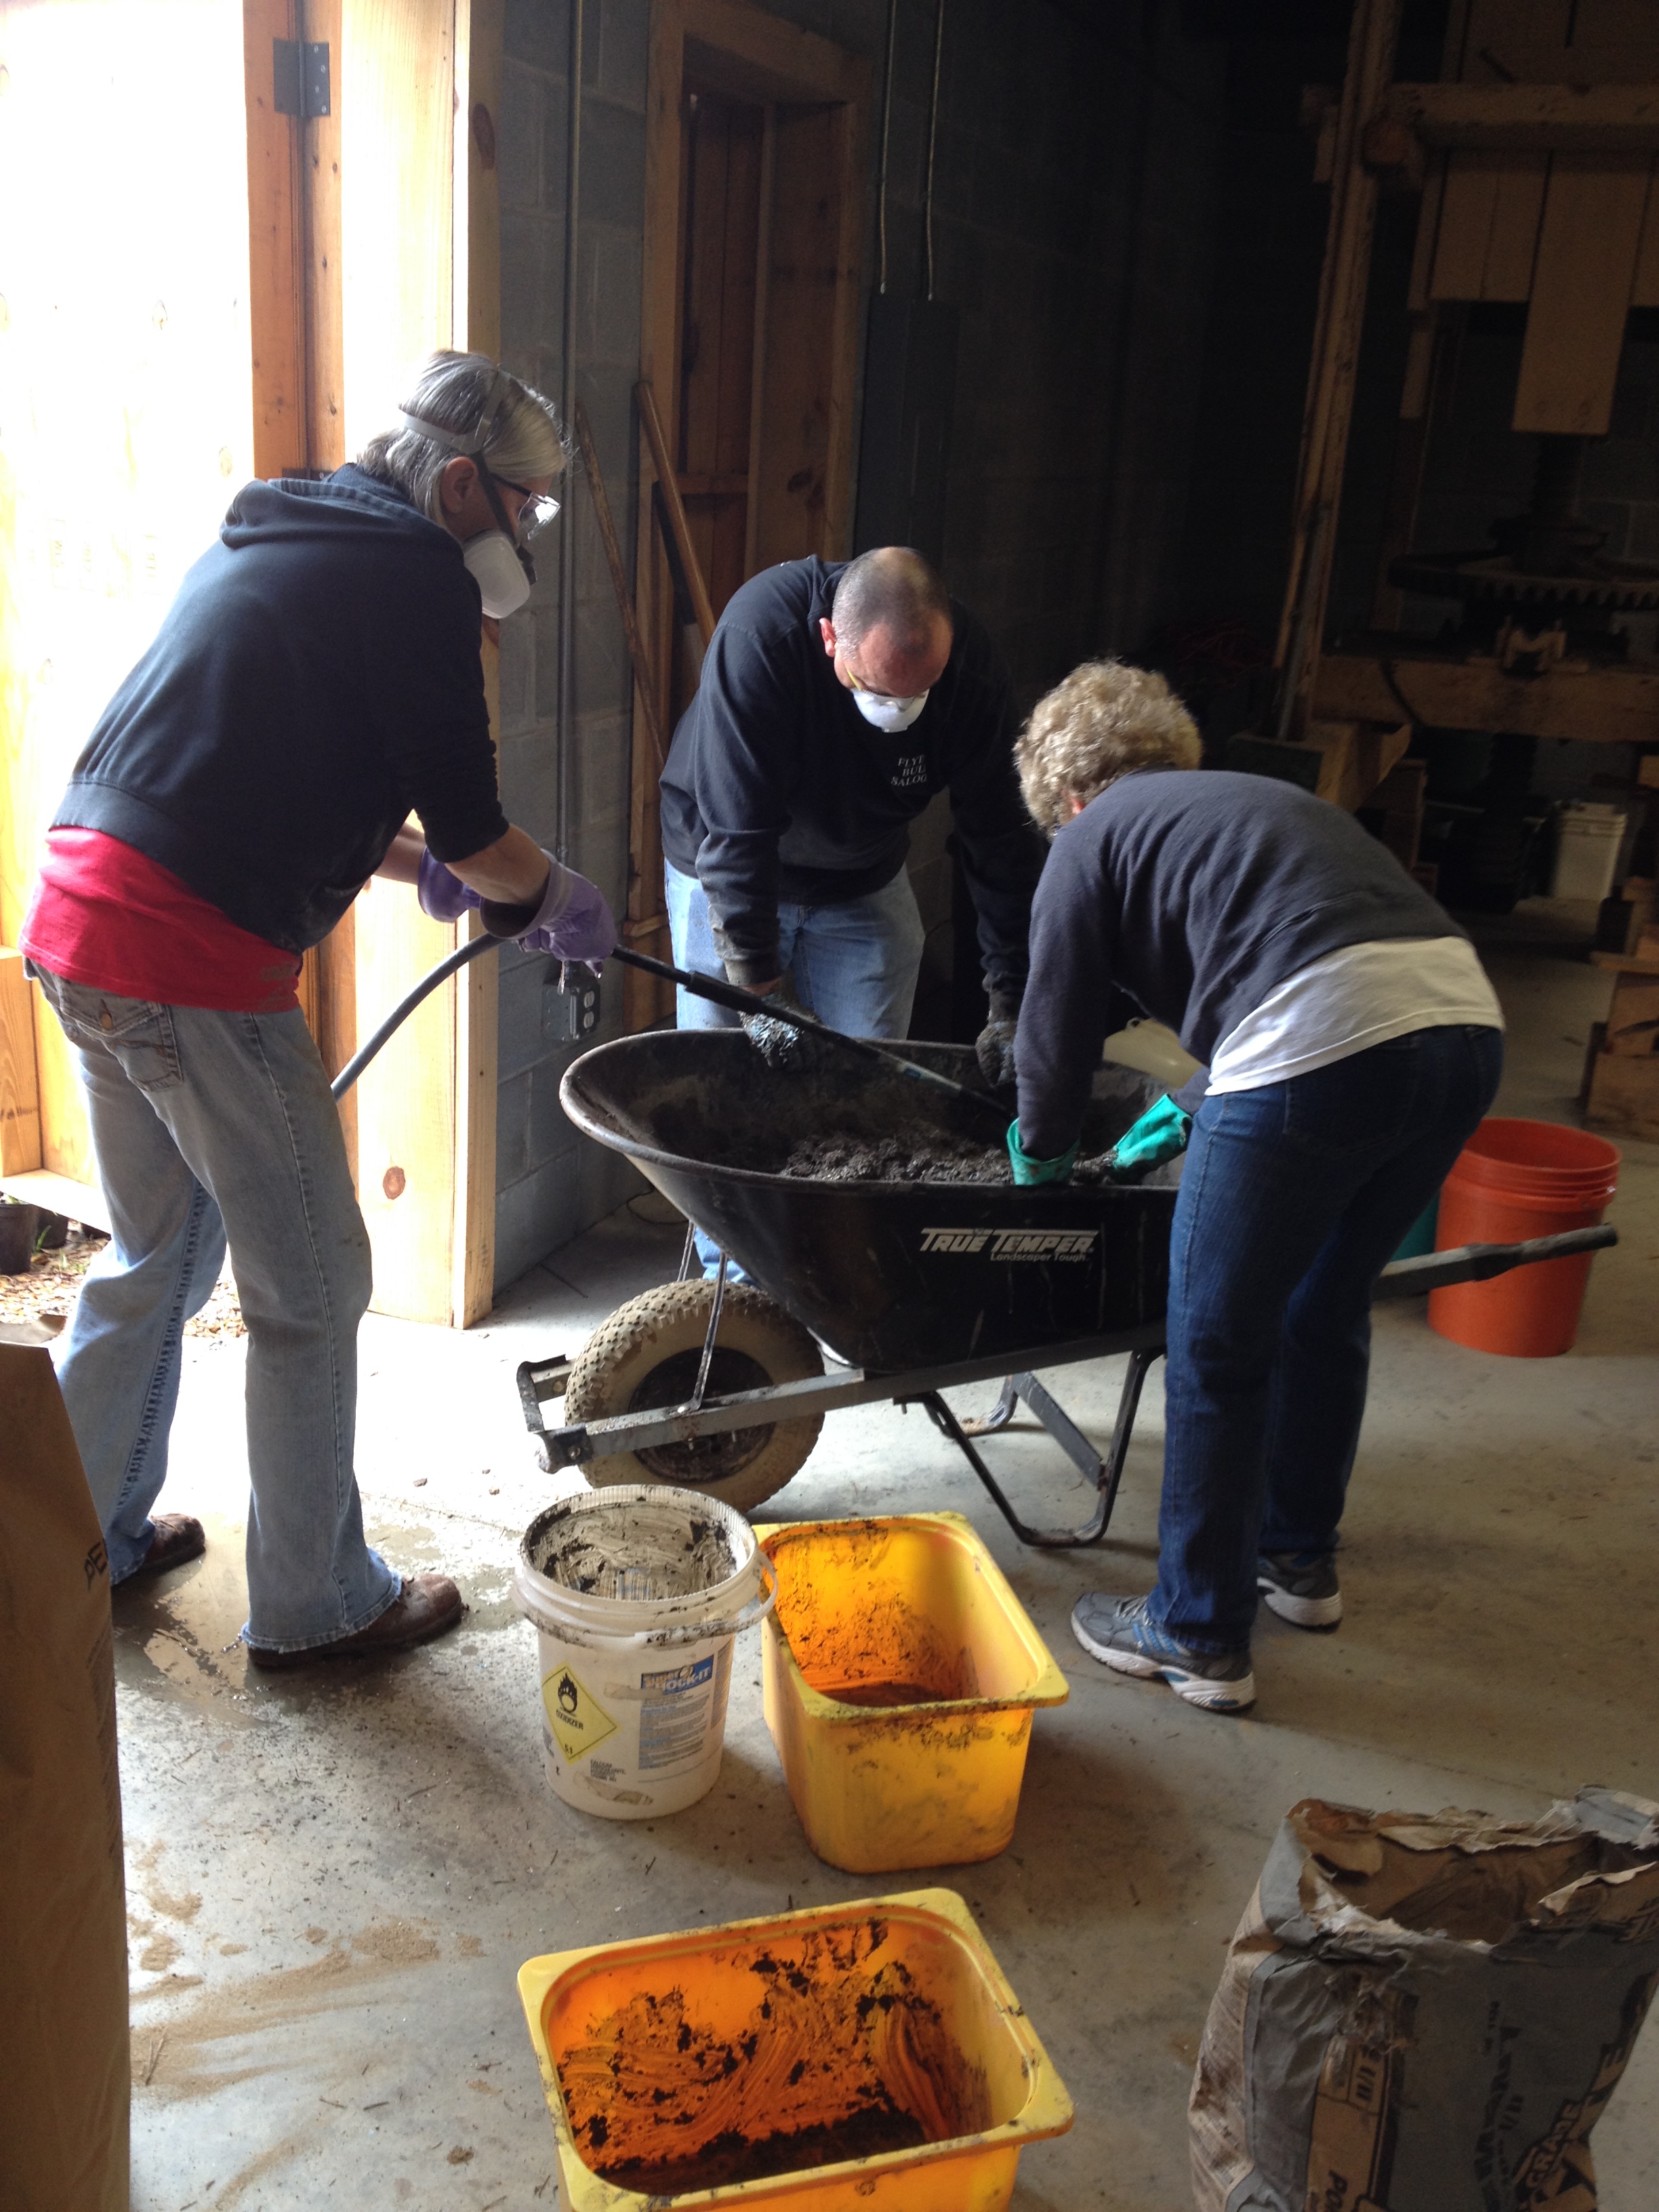
At our workshop, we used a formulation comprised of 2 parts Portland cement, 3 parts peat, and 3 parts perlite, plus a handful of fiber mesh. A couple notes on the ingredients.
- First, I’ve mentioned before that some gardeners are concerned that peat is becoming an unsustainable resource, so I wondered whether a peat substitute could be used. Short answer: yes, though the quality of the finished product may be different than a container made with peat. If you’re concerned about peat, you can use coir or a fine grade composted bark.
- Second, I wasn’t sure where to get fiber mesh, which is a reinforcing fiber used in concrete. Turns out you can buy it at amazon.com. Or if you know someone who works in construction, they can probably sell you a bit—it only takes a pinch to make a hypertufa container.
- Third, if you want to buy perlite and vermiculite, the big box stores will charge you an arm and a leg for a tiny bag. If you want to pay an arm and a leg, I suppose that’s your journey. But if you want to be thrifty, go to your local feed and seed store. Columbus folks can just go across the Chattahoochee to B.W. Capps in Phenix City—you can get a 4 cubic foot bag of perlite for $17.50 and a 4 cubic foot bag of vermiculite for $17.99.
In addition to the ingredients, you’ll need safety equipment, mixing container, a sturdy table, a plastic tablecloth, a form, some plastic bags grocery store bags with handles, and a large plastic trash bag for each form.
- Safety equipment. Hypertufa involves concrete, and you don’t want to breathe in concrete dust or get it in your eyes or your jewelry/watch. So when you are mixing the hypertufa ingredients, leave your jewelry and watch inside and wear safety glasses, a dust mask, and gloves. You can ditch the glasses and mask while you’re molding the hypertufa, but keep on your rubber gloves.
- Mixing container. You need a place to mix the ingredients. A wheelbarrow or a large plastic container will work.
- Sturdy table. It is important to have a sturdy work surface so that your hypertufa doesn’t jiggle a lot while you’re making it. Jiggling leads to cracks.
- Plastic tablecloth. Ms. Fogle recommends plastic tablecloths from the dollar store, although heavy duty plastic drop cloths will also work (but they’re more expensive). The tablecloth has two purposes. First, it covers your workspace so your table doesn’t get messy. Second, when you are finished molding your hypertufa, you will use the plastic tablecloth to cover it.
- Form (or not). You can do free form hypertufa, but the workshop did not cover that. We learned how to make hypertufa using a form. I used a small plastic bowl that was fairly rigid. You could also use a plastic flower pot, a sturdy plastic bag (like a cat litter bag), or even a cardboard box. If you are using an “outside in” approach (molding the hypertufa on the outside of your form), make sure your form doesn’t have a lip. If you are using an “inside out” approach (molding the hypertufa on the inside of your form), make sure your form isn’t too rigid.
- Plastic grocery store bags. You need a plastic grocery store bag or two to cover or line your form. The handles will make it easier to pull out your form when your hypertufa is dry. If your bag seems flimsy, use two.
- Large plastic trash bag. You will use the bag to wrap your hypertufa for drying and seasoning.
Once you have your gear, you’re ready to start! Before you mix the ingredients, have your form prepared—it should be covered in plastic grocery bags and sitting in your large plastic trash bag.

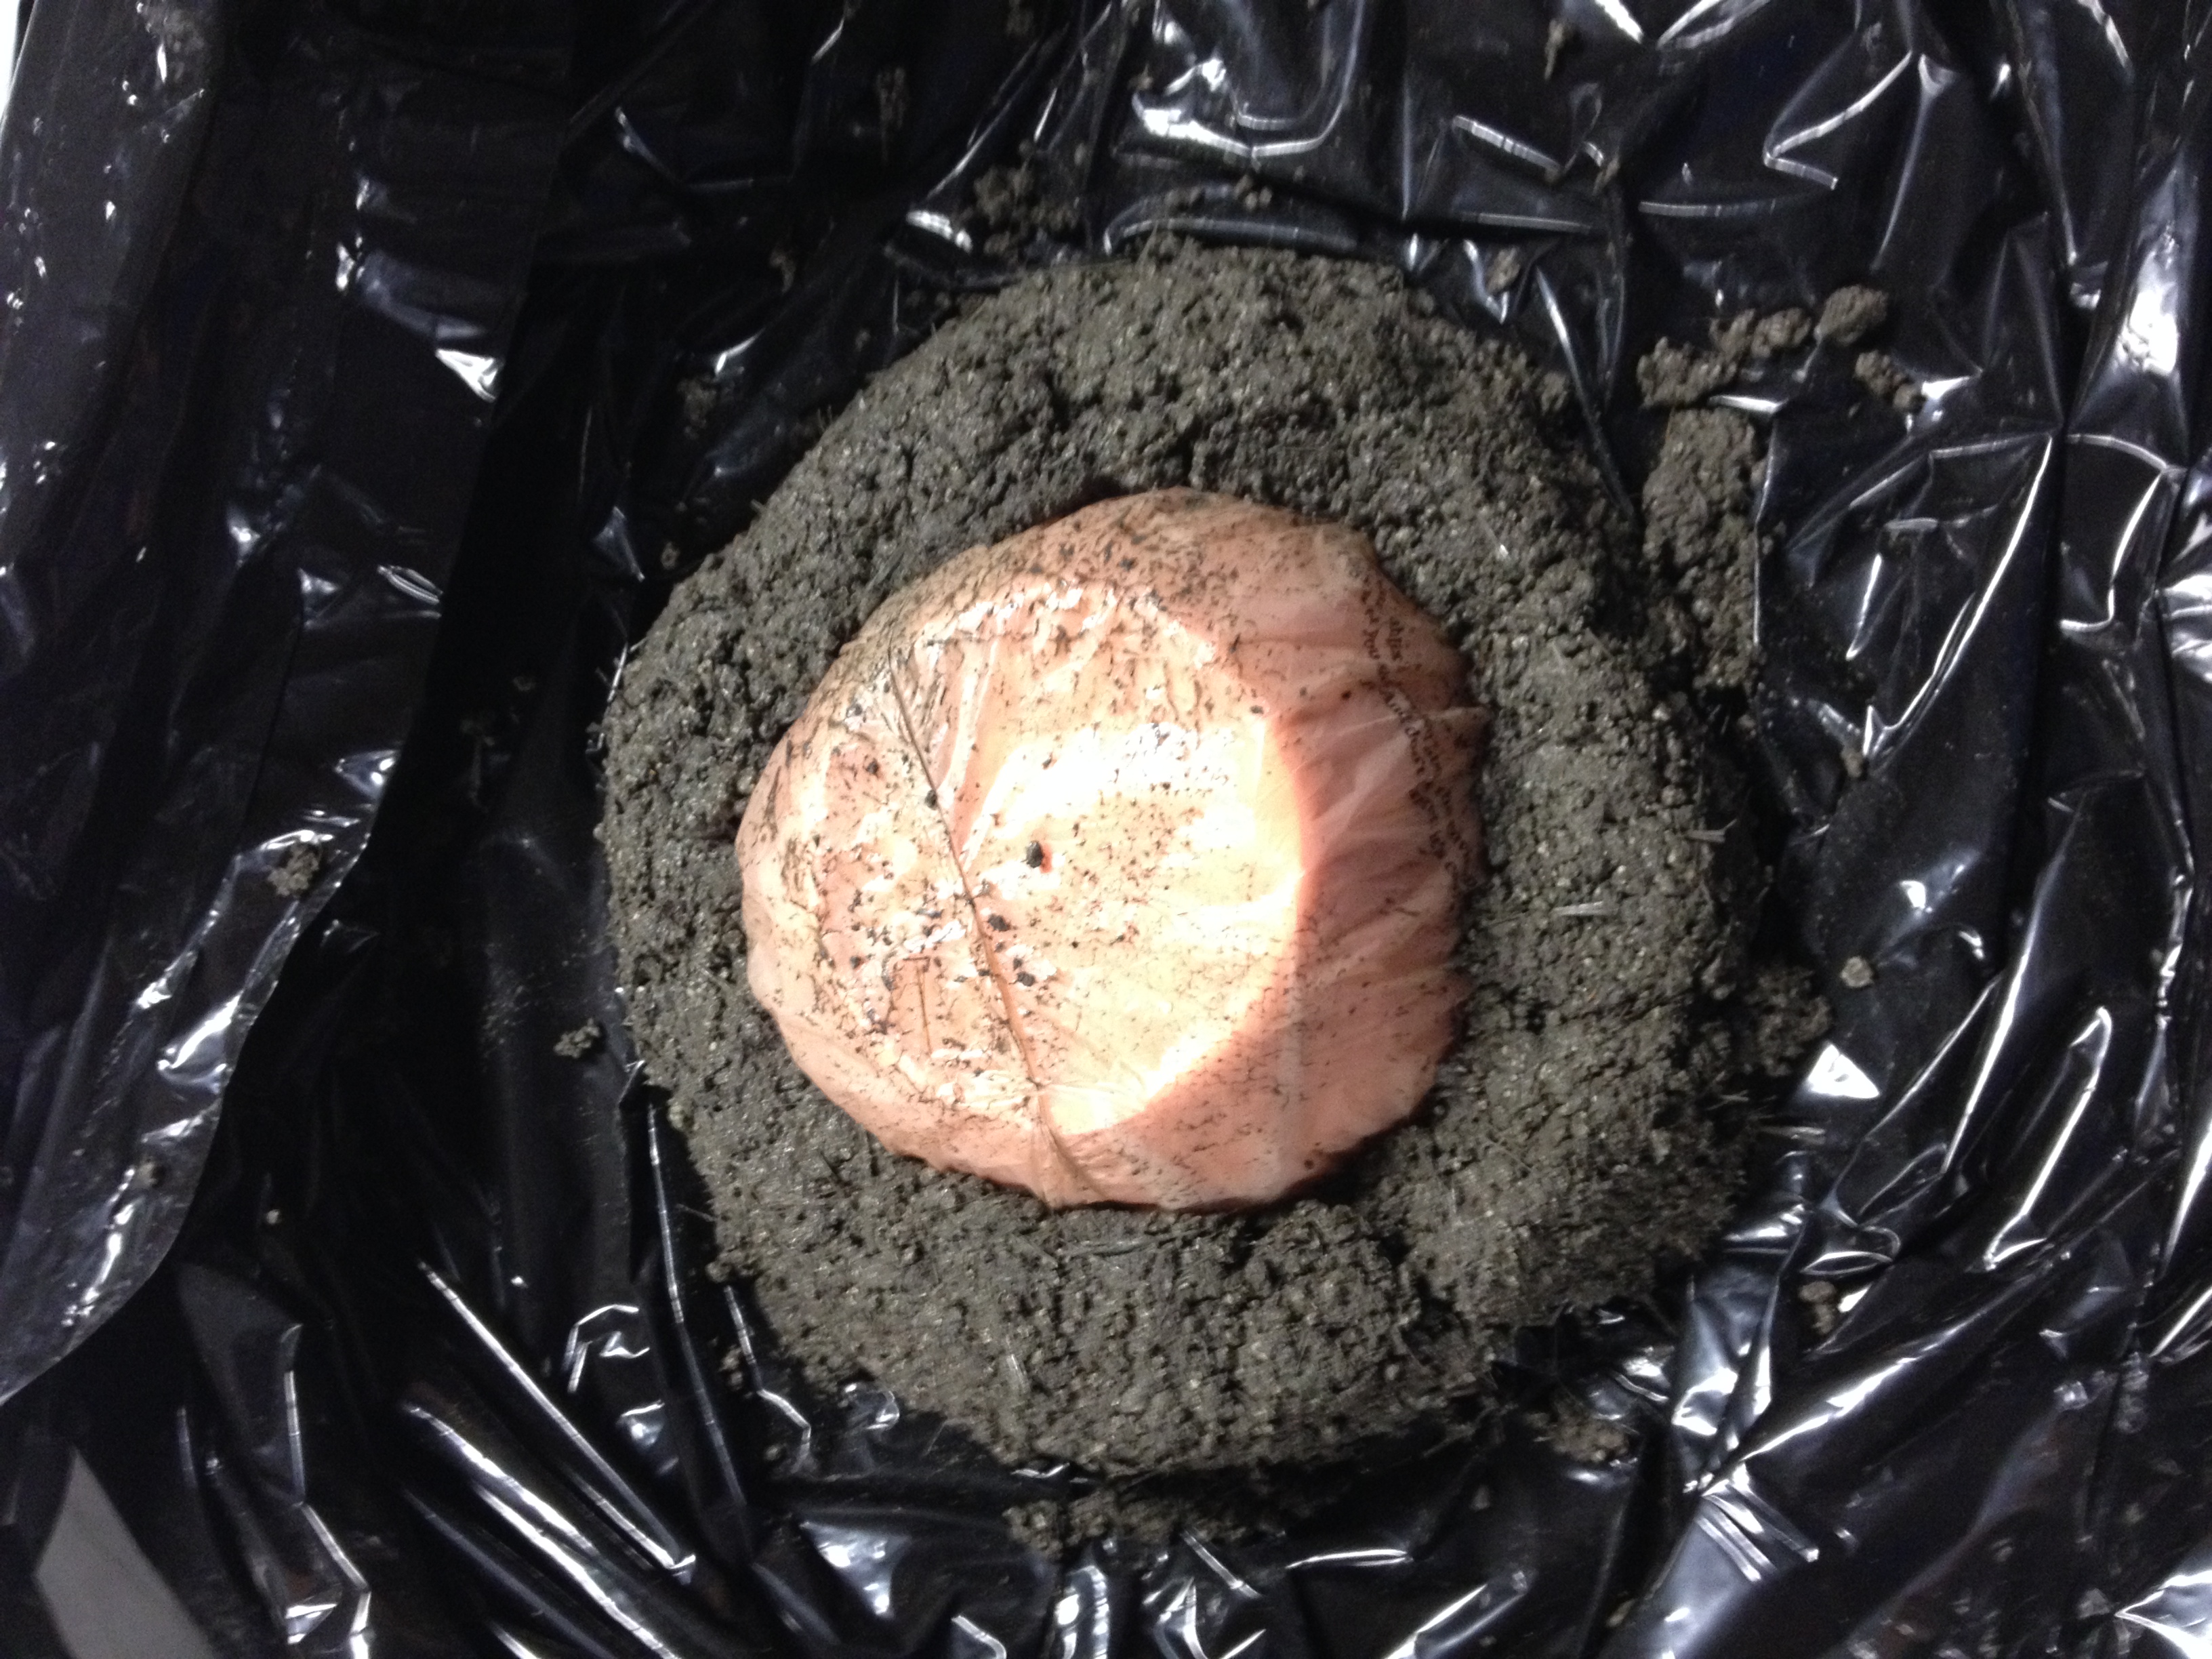
My Form: a Small, Plastic Bowl

My Form: Wrapped and Ready to Go
Mix your ingredients and slowly add water until your mixture is the consistency of cottage cheese.
Mixing the Hypertufa
Then, when you start, you must keep going until you’re finished. Build from the bottom of your form, keeping a depth of at least 1.5 inches, especially at the corners. You will be tempted to press the mixture with your fingers, but Ms. Fogle recommends focusing on using your thumb to tamp down the mixture while using your fingers simply to hold it in place. If you get puddles of water, you’re squeezing too hard! And when you get to the bottom of your vessel, make sure it is flat. You can use your finger (or a dowel) to check the depth and make a drainage hole.
Getting Started

Finished!

More Hypertufa Artisans
After you finish molding your hypertufa, the waiting begins. Carefully fold the garbage bag over your hypertufa and then fold the plastic tablecloth on top of the garbage bag.

Wrapped and Waiting
Ms. Fogle emphasized that you should not tinker with your hypertufa for at least three days. After three days, you may remove the form (go slowly; note: after a tugging gently, mine popped right out).

Ready to Remove the Form

My Hypertufa!
You can use a steel brush to smooth the surface (Ms. Fogle says that she usually doesn’t bother with this step: “I’m not fancy, I’m lazy”). And then, after that, you need to let the hypertufa season. In other words, let it sit for a month or 45 days covered in plastic (you may want to spritz it with water occasionally during the curing process). Then you can burn off any fiber mesh “whiskers” (Ms. Fogle uses a grill lighter; if you have a blowtorch, go for it). Finally, allow the container to weather outdoors for several weeks. This is not a quick process, but I’m sure it will be worth the wait!

Leave a comment